Showing posts with label Cuttlebug. Show all posts

Monday, July 10, 2017

Foiled Cards

Foiled Cards 

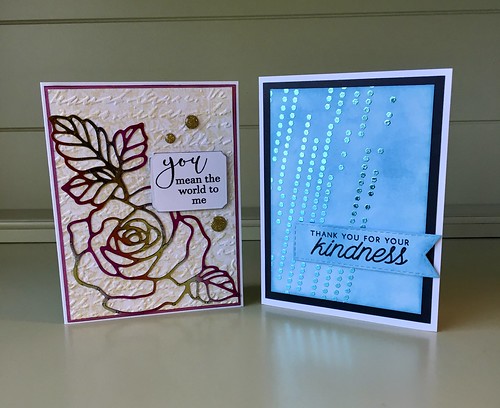
Sharing two cards I created using Therm O Web deco foil.
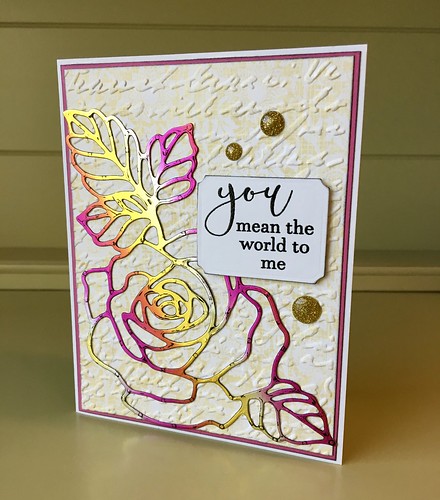
Foiled Card 

For the card above I used PeelnStick toner sheets from Therm O Web. I have to say I was really late to the party on using foiling on my cards. Actually I wasn't too interested. I took a class last September at the Mall of America that Gina from Gina K Designs hosted and I was hooked! I've followed Gina's blog and watched her videos on Stamp TV since 2008 so it was so nice to meet her. She is just a lovely person and so talented! 

Back to the card....after die cutting the Stampin' Up Rose Garden die with the toner sheet, I ran it through my Royal Sovereign laminator using summer rainbow deco foil. I love how it turned out! There were a few spots where the foil didn't adhere and I was fine with that. I like how that made it look more vintage. I adhered the rose to a panel that I ran through my Big Shot using a Cuttlebug embossing folder called script. The sentiment is from Gina K called All About You. I stamped and heat embossed the sentiment and die cut it using the large labels die from Spellbinders. The bling is from my stash that is from Recollections. 
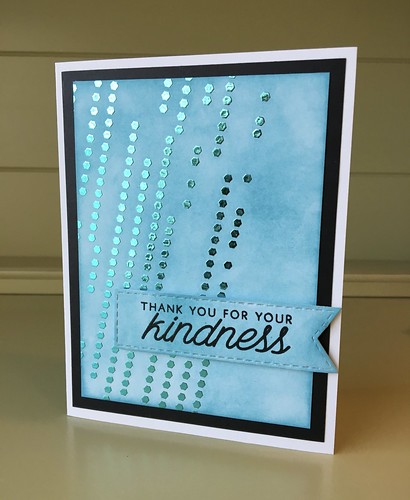
Foiled Card

For this card I used Therm O Web's deco foil transfer gel. What a game changer this stuff is! It's so nice to be able to use the stencils in your stash with foil! I smeared it on just like you would if you were applying embossing paste. I then added Therm O Web's aqua deco foil on top and ran it through my laminator. So easy! The sentiment is from Hero Arts called Acts of Kindness that I heat embossed and die cut with Taylored Expressions stitched banner stacklets. The stencil I used is called pixelated from Deco Art. I do like the look and I like the little bit of dimension that you get from using the transfer gel. 

I have made some more backgrounds with foil that I will share later. I haven't decided what sentiments I want to use with them just yet.

Thanks for stopping by!
SaveSave

Thursday, February 25, 2016

February Swap Card

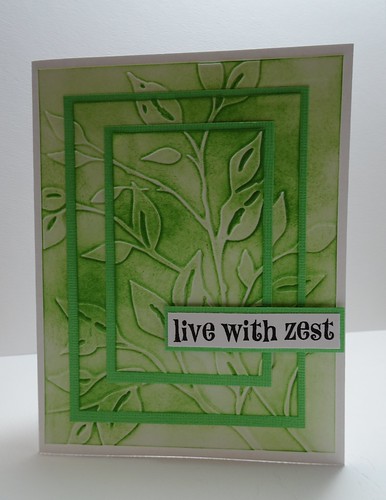
Live With Zest

It's time to share the cards I created for a swap I'm in. I can't believe how fast the month has flown by! It seems Like I just sent them off and now it's time to get new cards ready for the March swap. I really thought I'd have time to participate in some challenges and do some blogging about them. It seems there just isn't a lot of extra time for such things lately. 

I saw a video in on of the groups I belong to on Facebook for triple time embossing. I've always wanted to try the triple time stamping but I just haven't gotten around to it. This technique looked easy and I liked the look so that's what I went with this time for my swap cards. You can see the video I watched here.

For my first card above I used an embossing folder from Cuttlebug called Leafy Branch. The distress ink I used is called mowed lawn.

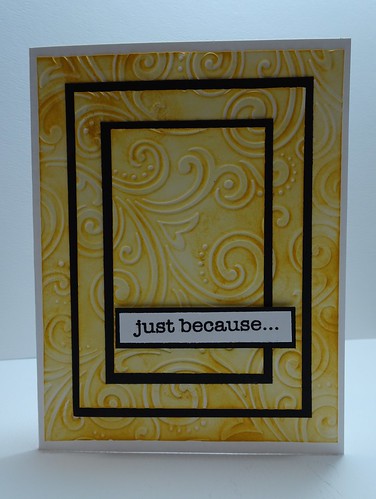
Just Because

This card uses an embossing folder from The Paper Studio called Intricate Swirl. The distress ink color is fossilized amber. 

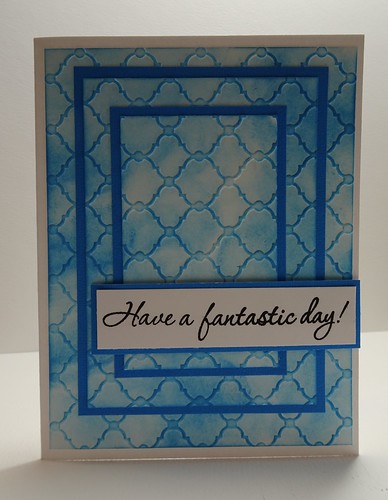
Have a fantastic day!

My final card uses an embossing folder called Whimsy from We R Memory Keepers and the distress ink used is salty ocean.

I loved using this technique and I'm sure I'll use it again. I don't think all embossing folders will work for this technique, but it doesn't hurt to try any that you may have. Now I'll have to try the triple stamping!

Thanks for stopping by! 

Sunday, January 11, 2015

Merry Monday Christmas Challenge: Merry Monday #140 {Snowflakes} & The 12 Months of Christmas Link Up!

Merry Monday Christmas Challenge: Merry Monday #140 {Snowflakes} & The 12 Months of Christmas Link Up!


This year I've decided to link up to as many Christmas Challenges as I can throughout the year. I'm hoping this helps me to get more holiday cards made so I'm not down to the wire when Christmas rolls around. I really got a late start this past year and although I made cards, I never sent them out! Not a one. That just means I have a head start for this year!

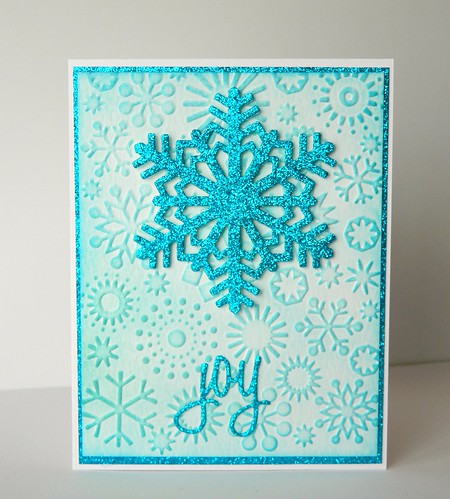
I'm using this card for two challenges: The Merry Monday Christmas Challenge and The 12 Months of Christmas Link Up. I decided to go with the snowflake theme for my card. For the 12 Months of Christmas Link Up the theme Father Time was optional so my card worked for both challenges.

I used a snowflake embossing folder from Cuttlebug for my background and inked it up with Tim Holtz distress ink in tumbled glass. I used a Tim Holtz Alterations Paper Snowflake Die for my glittery snowflake diecut from Recollections Brights Signature Glitter Cardstock. I also used the same paper for my mat and the word Joy cut from another Tim Holtz word die called Script. 

I REALLY love these word dies! I've been checking out all the new products coming out at CHA and I just know I have to have some of the new word dies from Tim Holtz! You can see them here on his blog! LOVE THEM!


Merry Monday #140 Snowflakes


The 12 Months of Christmas Link Up
Challenge #1 Optional Theme: Father Time

Hoping to get some more cards finished for some other challenges today and keep working on a custom thank you card order I'm almost done with. So many challenges, so little time! Thanks for stopping by! 

Monday, April 1, 2013

April Birthday Cards......And I'm Even Early!

Happy Birthday Using Washi Tape 

This will probably never happen again! I have my April birthday cards for the swap I'm in done early. One birthday is the 4th and one is the 9th and I mailed them today! I'm not sure if they read my blog or not, so I won't say who is getting which card. 

For the one above I used PTI for my base and the argyle embossing folder from Cuttlebug. The flower is from Prima (love their flowers!) and the gemstones are by Hero Arts. I used washi tape for the pattern on the strip and on the scalloped circle. Sorry, but I tossed all the packaging and I don't know who makes this tape. I used Nestabilities for the circles. The sentiment is from Hero Arts called Birthday Messages - CL139. I just ran my Black Soot Distress Ink around the edge to make the white "pop" a little.

Happy Birthday 

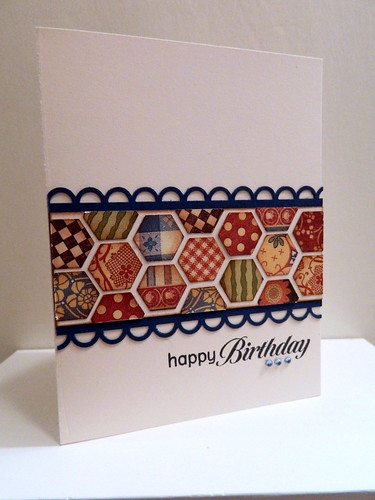
For this card I used one of my Creative Memories hexagon punches. The patterned paper is from Graphic 45's Domestic Goddess Collection. I After inking all the edges with Vintage Photo Distress Ink I placed them in a pattern and then trimmed the edges. I used the open scallop edge punch from EK Success on the blue cardstock. The blue gemstones are from Hero Arts as is the sentiment. The sentiment is from the stamp set Find Joy - CL497. The base is cardstock from PTI.

My plan is to try and stay one step ahead and get the May cards done ahead of time too. I'm not sure how that will work for me, but at least I have good intentions :)

Thanks for stopping by! This post is linked to these parties:
A Round Tuit
Made by you Monday
Crafty Showcase

Wednesday, September 5, 2012

Birthday Cards


I'm building a good collection of birthday cards, but I'm not done yet! For this card I did the same technique that I used for these cards. I really like the look and it's good way to use up scraps of patterned paper. I only have a handful of stamps that can be used for this technique. I'm on the lookout for more. 

For the base I used Kraft cardstock from Papertrey Ink. The red and white are Bazzill and I've used sheer ribbon. The pins are just stick pins I picked up somewhere along the way. I'm not sure who the manufacturer of the patterned paper is because I just pulled it out of my scrap stash. 


I used an older Sizzix die for the balloons on this card. I love going through my old dies to see what I can use for projects. I adhered them with some dimensional tape. For the center balloon I used a Hero Arts sentiment that fit just perfectly! It was a little tricky to line it up, but it worked. Again I'm not sure who the manufacturer of the paper is. I ran the cardstock through an embossing folder for a little texture. The card base is called True Black from Papertrey Ink.

Thanks for stopping by!
Below are some of the products used to make these cards:

Saturday, March 31, 2012

Wedding Cards

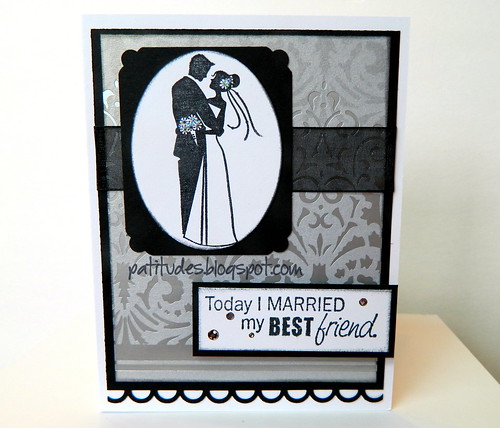
Today I Married.... 

Today I'm going to share two cards I've created for an order I'm working on. The third one I made about a month ago for another order for the same customer. I decided I better take a photo and blog after I make a few. Otherwise I get behind and end up having to do everything all at once.


Today I Married..... 

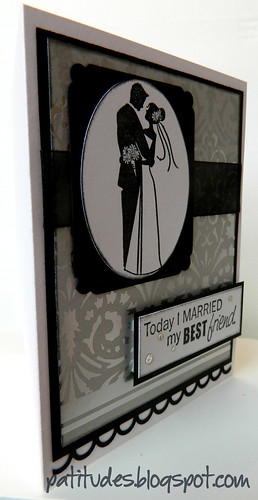
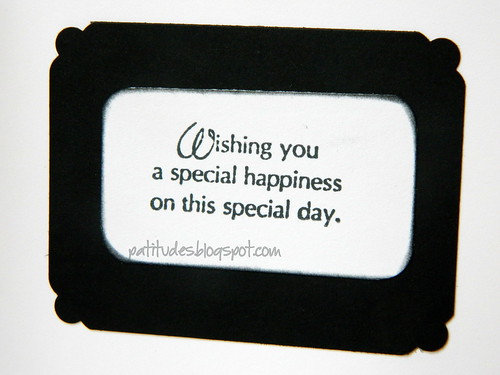
I popped up the sentiment on this one. I love this silver paper from TPC Studio. On the flowers I used some stickles to give them a little sparkle. Below is the sentiment I used on the inside.

inside of Today I Married....


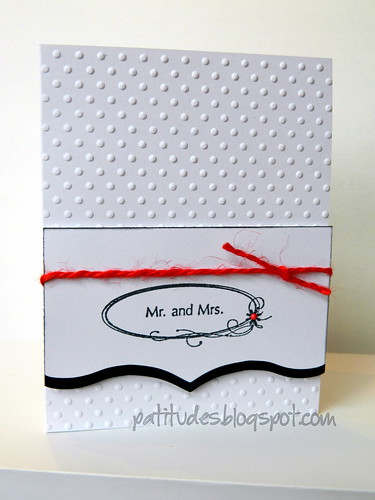
Mr. and Mrs.  

To give this card a little pop I added the red jute and liquid pearls to the center of the flower.

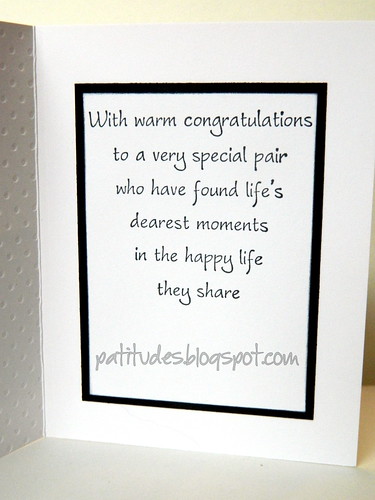
inside of Mr. and Mrs.

On the inside I used a stamp from Verses Rubber Stamps called Warm Congratulations.

Congratulations.....

I added a little color with the red bling on this one. 

I thought I'd share some of my favorite adhesives. Clockwise below I have my Scotch Advanced Tape Glider, Zip Dry Wet Paper Glue and foam mounting tape.


I'm so happy I decided to break down and buy the Scotch Tape Glider! After years of using inferior tape runners that don't adhere the cardstock to my projects I needed something new. I kept seeing people using them in videos I watch on YouTube. Thanks to my friend Susie over at Creative Cafe, I decided to purchase one. I asked her opinion and she emailed me a 40% off coupon for Michael's. It's a very aggressive adhesive which I love. When I use it, I know that nothing is going to fall off a project. I don't use it alot, but I would never go back to other tape runners that I once used.

My next absolute favorite is Zip Dry. I have other wet glues that I use for various projects, but this is my number one adhesive that I use exclusively. I use it for everything. I use this more than the tape glider.

The foam mounting tape shown in the photo above is something that I buy at the Dollar Store. I saw a video (I can't remember who did the video - sorry!) and the woman said that's what she used instead of buying foam pop up dots. What a fantastic tip! It's so much less expensive and all you have to do is cut it to size. I found it in the hardware section. I will never spend money on the other stuff again!


I was telling my husband I need more table space! The problem is I don't have room. I have one table to work on. The mess above is another table I use to the right of my work table. I like to pull everything out and have it at my fingertips while working. The only thing is, I fill it up so much I can't find anything! I really miss having a six-foot and a four-foot table to use like I did in our house in Minnesota. Now I'm down to two four-foot ones. My only option is to take the sofa out of my room. I can't do that because my furry friends use it. I wouldn't want them to have to lay on the floor!

Products used for these cards include: Cardstock by PTI, Stamps from Inkadinkado, Fiskars, Verses Rubber Stamps and Studio G, Sizzix and Cuttlebug Embossing Folders, Liquid Pearls, Stickles, Jute, Sheer Ribbon, Memento Black Ink, EK Success Edge Punch, Corner Punch from Creative Memories, Patterned Paper from TPC Studio, Stampendous! Dot Sparklers, Metallic Decor from Hero Arts.

I still have quite a few more cards that I'll be sharing as I finish them. Thanks for stopping by!

Tuesday, December 20, 2011

21 Days Of Christmas Cards - Day 20 - Merry Christmas Wreath

Merry Christmas Wreath
I'm getting an early start with my blogging this morning so I can hopefully finish up some last minute stuff today.

This card is secretly my favorite! I was trying not to give favoritism to one card over another, but I just love how this one turned out.

For the background I used a Cuttlebug Embossing Folder called D'Vine Swirls. I made the wreath out of snowflakes. I took two nestabilites and diecut a circle with a very slim edge. I did that so I would have a circle to adhere the snowflakes to. It also helped to keep the wreath round. If I hadn't done that, I know my wreath would have turned out lopsided!

Supplies used for this card: PTI in White and New Leaf, Bazzill in Hillary, Nestabilities, Martha Stewart Snowflake Punch, Tim Holtz Vintage Photo Distress Ink, Stamp from Inkadinkado, Cuttlebug D'Vine Swirls Embossing Folder, Hero Arts Art Flowers, Hero Arts Pearl Gemstones.

Thanks for looking!

This post is linked to these parties: Take-A-Look Tuesday, Tip Me Tuesday, Get Your Craft On! Tuesday.

Tuesday, December 6, 2011

21 Days Of Christmas Cards - Day 6 - Embossed Holiday Greetings

Embossed Holiday Greetings with Red Snowflake
This is Day 6 of my "21 Days Of Christmas Cards".

I love that embossing folders make it so fast and easy to create cards. If I would have made all of them using this design I would have been done in no time!

I used a Cuttlebug Embossing Folder and then used Tim Holtz Distress Ink over the top of the cardstock.

Other supplies used for this card: PTI Cardstock in New Leaf, White and Pure Poppy, Martha Stewart Snowflake Punch, Cuttlebug Embossing Folder, Gold Brad, Memento Ink in Bamboo Leaves and Tim Holtz Distress Ink in Vintage Photo.

This post is linked to these parties: Take-A-Look Tuesday, Handmade Tuesdays, Too Cute Tuesday, Tip Me Tuesday.

Thanks for looking!

Wednesday, July 6, 2011

Sympathy Cards

You Are In Our Prayers...
Today I'm sharing the sympathy cards I made for a friend. These are my favorite to create next to thank you and Christmas cards.

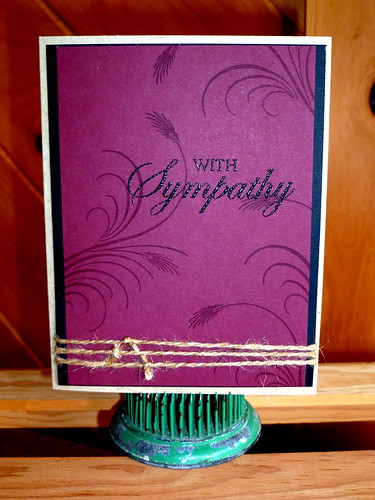
I used Core'dinations cardstock with a Cuttlebug leafy branch embossing folder which I then sanded. I love the texture of this card.
With Sympathy
This card was very simple and easy. I stamped the image with versamark, added a sentiment and jute and it was finished. I love the simplicity of it.
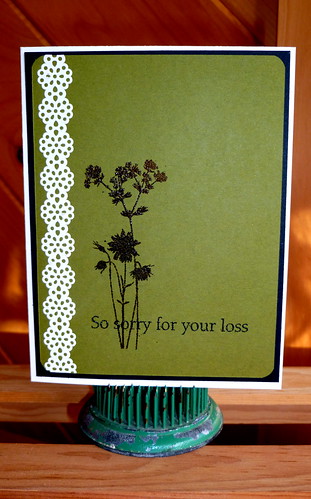
So Sorry....
Another very easy card. I clear embossed the image and sentiment and added some paper lace.

Other products used for these cards: PTI Cardstock, Tim Holtz Distress Ink in Vintage Photo & Black Soot, Paper Lace from K & Company, Making Memories Mini Brads, Hero Arts Stamps - With Sympathy - CL476, Feather Grass - CL282.

Thanks for stopping by!
Thursday, June 2, 2011

It's The Little Things.....

Don't you just love it when you can use up scraps? I made this card quite awhile ago and I'm just now getting around to posting it. I still have a few more left in my stash that I'll be sharing at a later date.
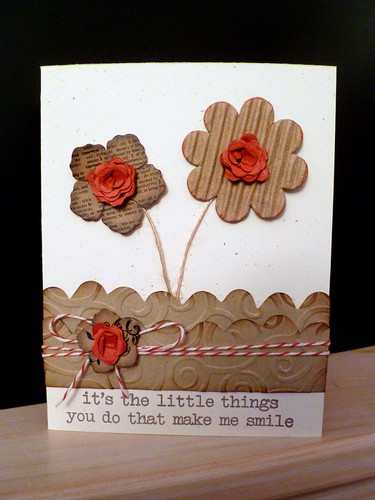
it's the little.....
I used leftover flowers from Graphic 45 and Jillibean Soup that I previously used for another project. I created the centers using my Nestabilities. For the 'grass', I used some small pieces of kraft that I ran through my Big Shot using my D'vine Swirls embossing folder. Don't you just love the Farmer's Twine! I just bought some more of it in all different colors. I just adore that stuff!

Products used for this card:
PTI base in Rustic White
Graphic 45 Flowers
Jillibean Soup Corrugated Shapes
Kraft cardstock
Tim Holtz Alterations On The Edge Scallops Die
Cuttlebug D'Vine Swirls Embossing Folder
Nestabilities Classic Scalloped Circles Small
Hero Arts Clear Stamps - CL487 - Thank You For Being My Friend
Farmers Twine from Shabby Green Door in Cherry Twist
May Arts Jute
Tim Holtz Vintage Photo Distress Ink
Memento Ink in Lady Bug

Thanks for stopping by!

Thursday, January 27, 2011

Tacky Memo Pad

Recently I made a plaque for my daughter's desk at work. I was going to make her another one, but she said she wanted a memo pad like I made here instead.
This is what I came up with:
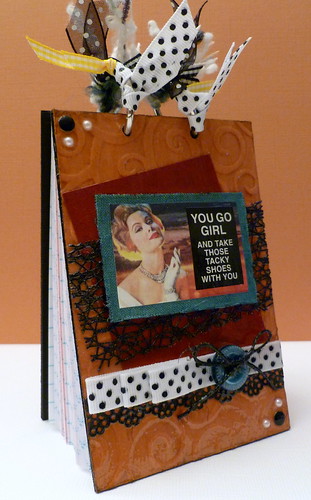
Tacky Shoes

I was going to bind it together using my Zutter Bind-It-All, but decided to use rings instead. I thought that was a better choice when she runs out of paper. That makes it refillable. She can just cut some (or I can!), punch two holes, insert the paper and it's ready to go.

To make this memo pad I cut chipboard to the size I wanted and then ran it through my Sizzix Big Shot using the Cuttlebug D'Vine Swirls embossing folder. I then covered the chipboard with Gesso and let dry. Using Making Memories acrylic paint, I mixed the colors Spotlight and Nutmeg together and painted over the Gesso. After that dried, I took acrylic paint in Espresso and mixed it together with Mod Podge and painted over the chipboard. I then wiped it off with a baby wipe. When it was completely dry, I wiped Tim Holtz Distress Ink in Vintage Photo over the top.

After I cut the cardstock, sticker and ribbon it was time to assemble all the pieces. I mounted the sticker onto a piece of turquoise SEI Linen. Wow! Do I love the texture of that stuff! Using my distress tool, I roughed up the edges.

I adhered everything to the chipboard with Mod Podge and then covered it with another coat. Once dry, I sprayed it with Mod Podge Clear Acrylic Sealer and added the paper and ribbons.

Here's a closer view:
Tacky Shoes1

My youngest daughter has decided that she'd like a plaque also. I'll probably make her a memo pad too. When they're both finished I'll be sure to share them!

Products Used For This Project:
D'Vine Swirls Cuttlebug Embossing Folder
Chipboard
Gesso
Making Memories Acrylic Paint
Mod Podge & Mod Podge Acrylic Sealer
Tim Holtz Distress Ink
Spiteful & Delightful Stickers
SEI Linen
Creative Imaginations Paper Lace
Hero Arts Pearls & Metallic Decor
Misc Cardstock & Ribbon Scraps

Tuesday, December 28, 2010

CPS 2010 Sketch Challenge (#148-#198)

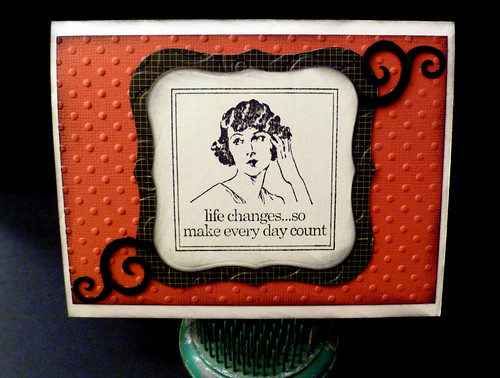
How true this is.....
life changes....
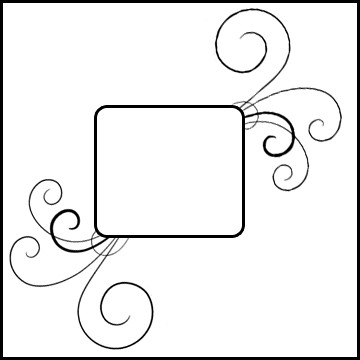
For this CPS (Card Positioning System) Challenge you were given a range of sketches you could choose from. I chose to use #196. I bought this stamp awhile ago and thought it was perfect for this sketch.
CPS196 1.1.11

Products Used For This Card:
CPS Sketch #196
Cuttlebug Embossing Folder - D'vine Swirls
Sizzix Embossing Folder - Swiss Dots
Bazzill
Nestabilities Labels One
Tim Holtz Distress Ink - Black Soot
Patterened Paper - Not sure, I used scraps
Felt Fusion - Scroll - Queen & Co.

Thanks for stopping by!

Glitter Snowflakes

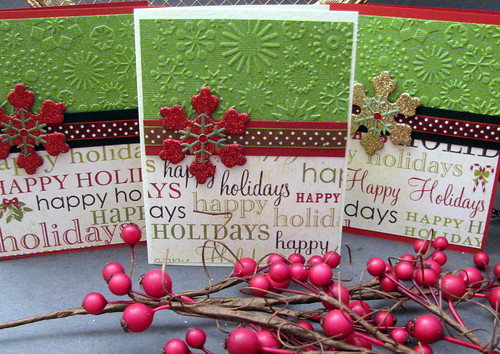
This card was one of the simplest and easiest to assemble that I created this season.
Glitter Snowflakes
I used the same snowflakes on this card that I blogged about yesterday. They were a great value and very versatile. I also took some snowflake ribbon from May Arts and cut them apart. I then dyed them with my Bamboo Leaves Memento Ink, added it to the center of the snowflake and finished it off with a Stampendous! Dot Sparkler.

The top portion of the card combines Core'dinations cardstock with a Cuttlebug Snowflake embossing folder. The bottom portion is patterned paper "Happy Holidays Mistletoe" from Making Memories.

Hope your week is going well. Thanks for taking the time to stop by!

Products Used For This Card:
Core Couture from Core'dinations
Bazzill
Making Memories - Happy Holidays Patterned Paper
Cuttlebug Embossing Folder
Ribbon from JoAnn Crafts
Snowflakes called Scatterables from Holiday Time
May Arts Snowflake Ribbon
Memento Ink in Bamboo Leaves
Stampendous! Dot Sparklers

Thursday, December 23, 2010

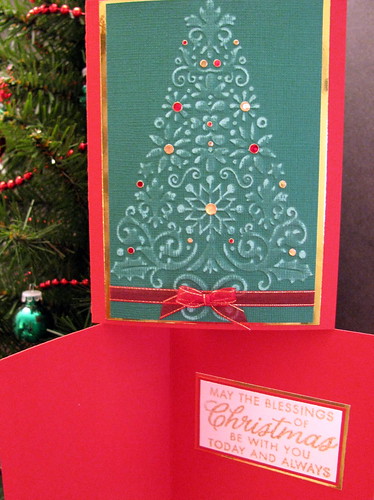
May The Blessings Of Christmas....

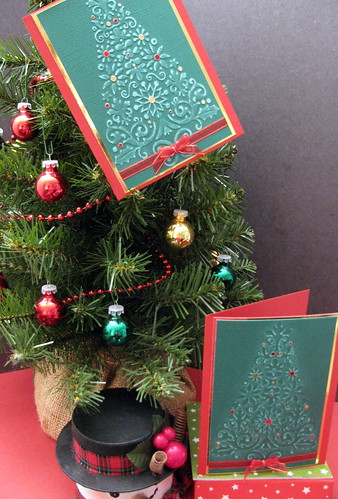
....be with you today and always. I love this stamp set "Joy To All" from Hero Arts. For this card, I used a Cuttlebug embossing folder with Core'dinations cardstock and then sanded it. I embossed one tree and debossed the other. It's hard to tell that from the photo.

Tree Embossed Debossed

Here's a closer look and the sentiment inside:

Inside Tree Embossed Debossed

Products Used For This Card:

Bazzill
Core'dinations Cardstock
Mirrorcard
Cuttlebug Embossing Folder
Stampendous! Gold Embossing Powder & Dot Sparklers
May Arts Ribbon
Versamark
Hero Arts Clear Stamps - Joy To All - CL460

Thanks for stopping by!

Sunday, December 19, 2010

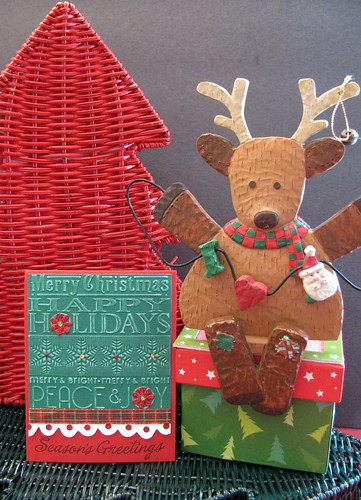
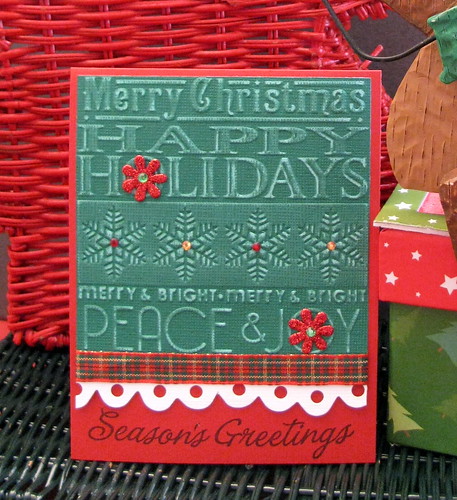
Embossed Season's Greetings

I thought I'd decided which holiday card was my favorite, but I think I may have changed my mind. I love how this one turned out!

I used a Cuttlebug Embossing Folder (not sure of the name - sorry!) with Core'dinations cardstock and then I sanded it. I cut off the bottom portion that said Season's Greetings and Noel so that could use a Hero Arts stamp.
Embossed Seasons's Greetings
I then added some of my favorite plaid ribbon. Here's a closer view:
Closeup Embossed Season's Greetings

Products Used With This Card:
Bazzill
Core'dinations Cardstock
Cuttlebug Embossing Folder
Tim Holtz Alterations On The Edge Die - Scallops
Dazzlers Florettes by Petaloo
Hero Arts Gemstones
Hero Arts Clear Stamps - Joy To All - CL460
Ribbon from JoAnn Crafts

Hope you're having a wonderful day!

Wednesday, October 13, 2010

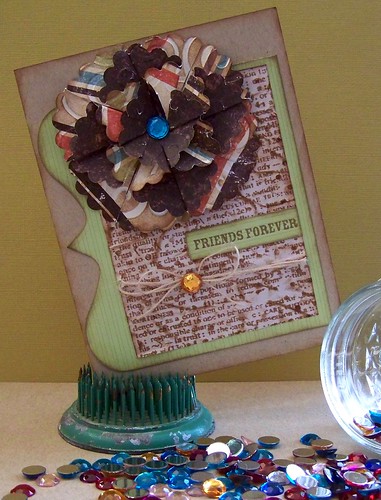
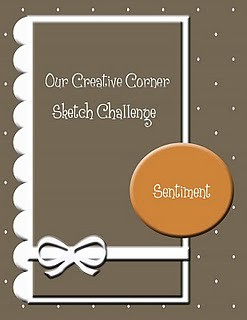
Our Creative Corner Sketch Challenge

I created this card for the challenge over at Our Creative Corner. Flowers are my favorite, so that's what I used for my focal point. To make my flower I used patterned paper from my scrap pile, so I don't know who the manufacturer is.
My card:

Friends Forever

The Sketch:

OCC_Sketch_Challenge_-_Created_by_Diane_Gilbert_copy

Supplies used for this card:
Bazzill Kraft
Newsprint
Sizzix Swiss Dots Embossing Folder
Cuttlebug D'Vine Swirls Embossing Folder
Moxxie Diecut
Nestabilities Classic Scalloped Circles Small
Tim Holz Distress Ink in Vintage Photo
Patterned Paper (?)
Hero Arts Rubber Cling Stamp "Friend Definition" CG125 &
Clear Stamps "All Occasion" CL272
Our Creative Corner Sketch Challenge

Thanks for stopping by!
Thursday, August 26, 2010

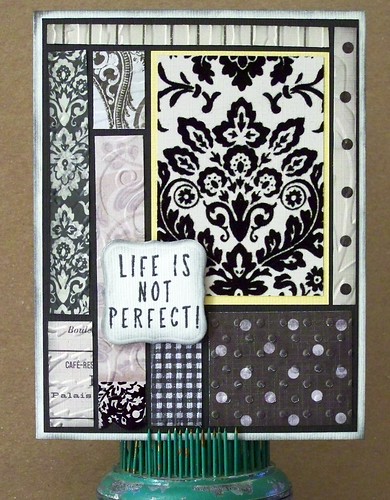
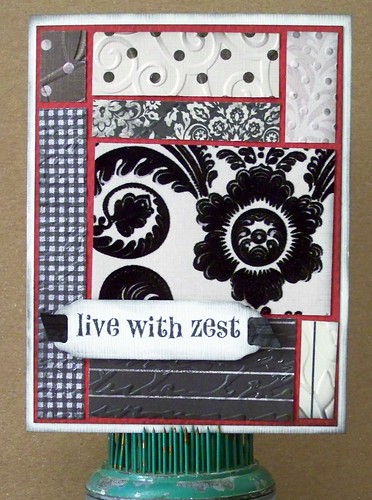
Cards From Scraps

This morning as I was having coffee and contemplating making my workspace a little neater an idea for cards came to me. Since I'm easily diverted cleaning up my mess was put aside and I created the cards below. I have so many scraps since I can't stand to toss anything. I think they worked beautifully! The scraps are from the Paris Nights Collection from G.C.D. Studios.

Life Is Not Perfect!


I really like this stamp set by Hero Arts.

Live With Zest


Products used for these cards: Bazzill, Paris Nights Collection by G.C.D. Studios, Nestabilities Labels One and Ribbon Tag Trio, Memento Ink in Tuxedo Black, Tim Holtz Distress Ink in Black Soot, Various Sizzix and Cuttlebug Embossing Folders, Hero Arts Clear Stamps "Life Is Not Perfect" CL 387

Sunday, June 20, 2010

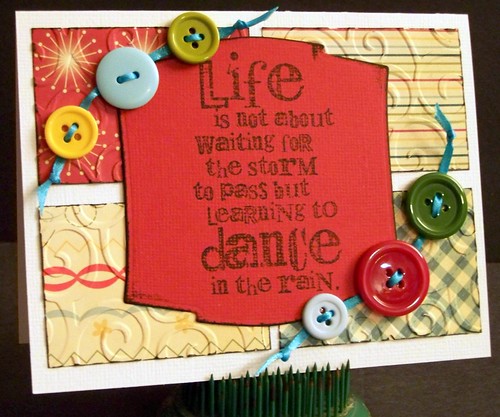
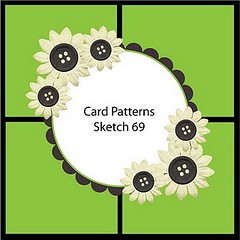
Card Patterns Sketch 69

I've been concentrating more on scrapbooking lately and I've missed participating in card challenges. When I saw this sketch from Card Patterns, I knew I wanted to create a card. This is the first time I've used my new stamps from the Tim Holtz Collection called Good Thoughts. I think they may become a favorite!


Card Patterns Sketch 69


sketch69


I'm pretty happy with how this card turned out. I like how colorful it is.

Products Used:
Bazzill Cardstock
Cosmo Cricket Patterned Paper
Nestabilities Labels Two
Stamp from Tim Holtz Collection - Good Thoughts CMS5085
Cuttlebug Embossing Folder - D'vine Swirls
Misc Buttons
Ribbon

Thanks for stopping by!
Saturday, April 24, 2010

Two Challenges In One

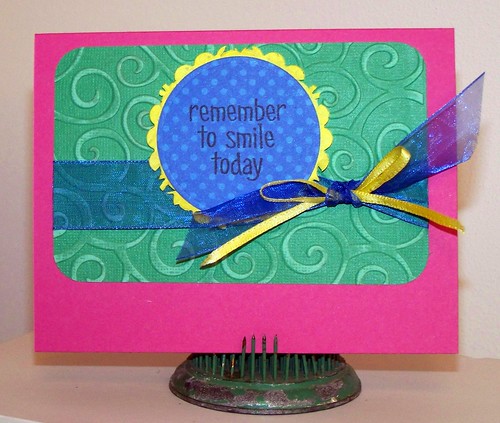
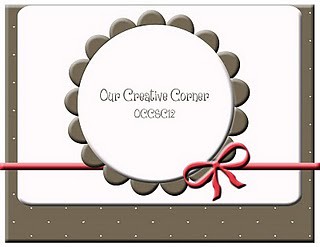
I don't think I've ever made a card incorporating two challenges before. For this card, I combined Embellish Magazine's Color and Embossing Challenge with Our Creative Corner's Weekly Sketch Challenge.

For the color challenge you had to use either dry or heat embossing. I used the D'vine Swirls embossing folder by Cuttlebug for the embossing on the Coredinations cardstock and then sanded it.

I also took a small paper doily and inked it with Stampin' Up Yo Yo Yellow ink. Then I used a Nestabilities circle die to cut it smaller so just the edges peek out from under the blue circle that was also cut using a circle die.

Remember To Smile

EmbellishEmbossing_PracticingCreativity

OCCSC12_-_Designed_by_Jennifer_meyer


Products Used For This Card:

  • Magenta Paper by The Piece for card base
  • Coredinations Core Color Cardstock
  • Blueberry Dot by BoBunny
  • Ribbon
  • Stampin' Up Yo Yo Yellow Ink
  • Memento Tuxedo Black Ink
  • D'vine Swirls Embossing Folder by Cuttlebug
  • Nestabilities Circle Die Cuts
  • Hero Arts Clear Design Stamps - Huge Hugs - CL417
09 10