Showing posts with label Martha Stewart. Show all posts

Wednesday, September 27, 2017

So Very Thankful

fullsizeoutput_179b

I finished my card for the design team that I'm on just by the skin of my teeth! Normally I try to work ahead if at all possible. For some reason I struggled with this sketch! It's such an easy sketch, I'm not sure what my problem was. I kept going over and over in my head what I wanted to do. I'd start working on my card and then scrap the whole thing. I'm just happy I finished it and can move forward!


So Very Thankful

I used a stencil from Stampin' Up with fossilized amber distress oxide ink. I brushed it on with one of my Clarity brushes. The butterflies were cut using two Martha Stewart punches. I took painters tape and added fossilized amber and black soot ink to my cardstock before punching the butterflies.

So Very Thankful

For my sentiment I used a stamp from Gina K Designs.

Be sure to stop by the Atlantic Hearts Sketch Challenge and check out the weekly challenge!

Supplies:
Stampin' Up: Happy Patterns Decorative Masks
Martha Stewart: Butterfly punchs
Ranger: Distress Oxide Inks: fossilized amber, black soot
Amuse: Creative Candy
Gina K Designs: Scripty Sayings

Thanks for stopping by!

Saturday, November 28, 2015

Saturday Morning Cards

Thanks

I created three cards this morning with two backgrounds I made earlier using some Brusho Crystal Colours. I really love playing with them!

For the first card I used a Heidi Swapp stencil for the background. I covered it with three different Brusho colors and then spritzed it with water. I saw a Hero Arts video awhile ago and used the tip to diecut a circle out and add some acetate. I actually added two pieces so that I could add some sequins in between. It's not a shaker card as the sequins don't move very easily. I just wanted them in the background. I diecut the word from fun foam and stamped the rest of the sentiment using Hero Arts Thanks Stamp & Cut set. 

For the card below, not wanting to waste the circle I diecut I decided to adhere it to a doily I diecut using Prima's Doilies one die. I diecut the sentiment by Simon Says Stamp from fun foam. The butterflies are from a Martha Stewart punch. 

Happy Birthday

Happy Birthday

For my last card I used Prima stencil. Again I added Brusho colors over the top and spritzed with water. I added a strip of glitter paper and finished it off with a sentiment from the Handwritten Borders stamp set by Simon Says Stamp.

Thanks for stopping by!

Sunday, December 28, 2014

Mojo Monday Challenge 377

Mojo Monday Challenge 377

Whew...I just finished my card for the Mojo Monday Challenge! I was even able to get a half decent photo before the sun went down. I had planned to finish my card yesterday so I wouldn't feel rushed today but I got detained with other stuff. 

I used DCWV's The Old World Stack for the patterned paper and PaperTrey Ink cardstock in vintage cream for my base. The die cut is called Arianna Lace from Heartfelt Creations by Spellbinders. I used the edge punch from EK Success called dotted scallop for the edges on the the pinkish/maroon colored cardstock. The butterfly was punched with a Martha Steward punch. For the sentiment I used a Hero Arts stamp set called Find Joy. Gems are also from Hero Arts. 

I haven't played along with a Mojo Monday sketch for a long time! I used to love creating from their sketches. Hoping to be able to do them every week if I can squeeze it in!


Mojo Monday Challenge 377

Thanks for stopping by!

Saturday, February 8, 2014

Unscripted Sketches #243


I haven't had a lot of crafting time lately so I got this card done for the Unscripted Design Team just in the nick of time! I've also been struggling with just getting myself organized and getting the creative juices flowing. I've joined a few more monthly swaps in the hopes that it will help me get out of the funk that I'm in. 


For this card I used Graphic 45's Little Darlings collection. It's one of my favorites! I used one of the chipboard pieces and cut out several of the images from different sheets of the card stock. The butterflies are from a Martha Stewart punch.

Hope you'll join us this week with your take on the sketch above. All the details are on the blog post over at Unscripted Sketches! You don't have to have a blog in order to play. If you load your creations to a gallery, just add the direct link to your project and be sure to give credit for the sketch to Unscripted Sketches. That's it!

Products Used:
Base Cardstock - PTI in Lemon Tart
Patterned Paper - Graphic 45 Little Darlings
Ink - Tim Holtz Distress Ink - Vintage Photo
Seam Binding
Gems: My Mind's Eye, Doodlebug Design and Mark Richards
Butterflies: Martha Stewart punch

Saturday, January 25, 2014

Unscripted Sketches #241


Here's my take on the Unscripted Sketch for the Design Team this week. I went out of my comfort zone and used purple. I'm not sure why, but I just don't use that color very much. I often say that purple isn't one of my favorite colors. I'm actually kind of neutral about it. I wanted something colorful for this card and I think I achieved that using the green and orange. 


To add dimension I just secured the center of the butterflies to the card and added a button with some twine. 


Please join us this week with your take on the sketch above. All the details are on the blog post over at Unscripted Sketches! You don't have to have a blog in order to play. If you load your creations to a gallery, just add the direct link to your project and be sure to give credit for the sketch to Unscripted Sketches.

Products Used:
Base Cardstock - PTI in White
Patterned Paper - Core'dinations - Brights - Textured - Carnival
Stamps - Hero Arts - Everyday Sayings - CL342
Ink - Tim Holtz Distress Ink - Black Soot & Memento - Jet Black
Gems - Crystal Stickers - Pearls
Butterflies - Martha Stewart Punch
Twine - American Crafts

Saturday, December 21, 2013

Unscripted Sketches #236


This is probably the Christmas card I like the most that I created this season. Pairing black with red and white are high up on my list of favorite combinations. I like unconventional colors for holiday cards. 


Great versatile sketch to use for any occasion!


I really like this patterned paper from Heidi Swapp! Here's a tutorial that I came across for the bow I made. 

Please join us this week with your take on the sketch above. All the details are on the blog post over at Unscripted Sketches! You don't have to have a blog in order to play. If you load your creations to a gallery, just add the direct link to your project and be sure to give credit for the sketch to Unscripted Sketches. That's it!

Products Used:
Base Cardstock - PTI in Pure Poppy & White
Patterned Paper - Believe Paper Pad by Heidi Swapp
Stamps - Hero Arts - Very Merry Christmas - CL543
Ink - Ranger Archival Ink in Jet Black
Gems - Crystal Stickers - Pearls
Border Punch - Martha Stewart - Eyelet Lace

Tuesday, October 22, 2013

Used Stamps


ClearStamps

As I've been setting up my craft room, I've been going through my stamp collection. I've found several that I don't use anymore. I think I've listed a little over 40 items! Some of these sets have barely been used, some never used and some have been well used.  Some of the very well used sets I purchased from a scrapbook store that used them for classes.

Rubberstamps

I've listed them all on eBay. If you're interested you can see them all here. You can also access my eBay store from my Pattitudes Facebook page. Just click on the Shop tab on the top right.

embossingfolders

I also found a few embossing folders that I accidentally bought twice! I'll be listing a few more items over the next few days. Keep checking back in my eBay store because you never know what you'll find! 

Thanks for stopping by!

Thursday, May 2, 2013

Thank You and Sympathy Cards

You are in our thoughts and prayers

I thought I'd attempt to use up some of the patterned paper that I've been collecting over the years. Most of it I have filed by manufacturer and I just have one sheet of this and that. My thought was to take a sheet and make three or more cards from it. I love the pattern on this one but unfortunately I tossed the barcode strip and I don't know who the manufacturer is. 

For the card above and below I used the same stamp set for the sentiments and images. It's a Hero Arts set called With Sympathy - CL476. I've really gotten a lot of mileage out of this set.  I also used an EK Success stamp for the border on the first card. For the image on that one I heat embossed it with black embossing powder. The one below was stamped with Smooch ink.

Sending caring thoughts your way

For the thank you card below I used another Hero Arts stamp set called Feather Grass - CL282. The edge punch is from Martha Stewart. Cardstock used for all cards is from PTI. Bling is from Hero Arts and Stampendous.

thank you for your kindness

This post is linked to these parties:
A Glimpse Inside: Catch a Glimpse Party
Seven Alive: Link It Up Thursday
Chic and Crafty Party!

Thanks for stopping by!

Sunday, April 7, 2013

Scrappy Girls Make It Better Challenge #3

Birthday Wishes 

Whew! I just finished my card for the Scrappy Girls Make It Better challenge by the skin of my teeth! The sketch is below and it's one from Tsunami Rose Designs. I've had all week to work on this as the challenge runs from Monday to Sunday. I really struggled with this one and almost threw in the towel. I tried many combinations and just couldn't find something that I liked. We were to use the sketch and incorporate our favorite colors. I love black, red, kraft and white together. I have so many favorite colors and combinations and this is just one of many. Finally something clicked and I was able to create this card.

For this card I used kraft cardstock from PTI and Bazzill cardstock in black and white. The Martha Stewart edge punch I used is called eyelet lace. The buttons are from my stash. The patterned paper is from Creative Imaginations. The sentiment is from Hero Arts called Birthday Messages - CL139.

The Scrappy Girls Make It Better is a group that is open to the public. You can visit it by clicking here.


Thanks for stopping by! This card will be linked here:


Tuesday, February 12, 2013

Graphic 45 Nutcracker Sweet Mini Album

Graphic 45 Ring Bound Nutcracker Sweet Mini Album

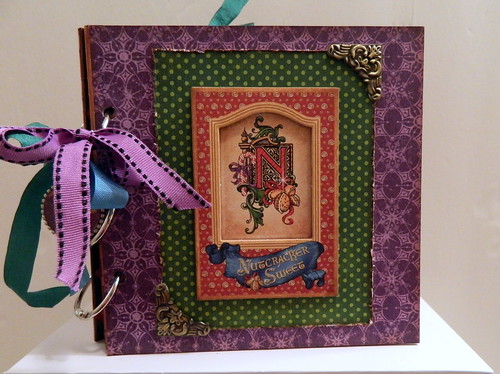
I just finished two more mini albums using Graphic 45's Nutcracker Sweet collection. I bought everything that they had this collection except for the stamps. So far I've been able to create three 6 x 6 - inch books. Now I'm going to work on some smaller albums. You can see my first album here

G45 RB Nutcracker Sweet Mini2

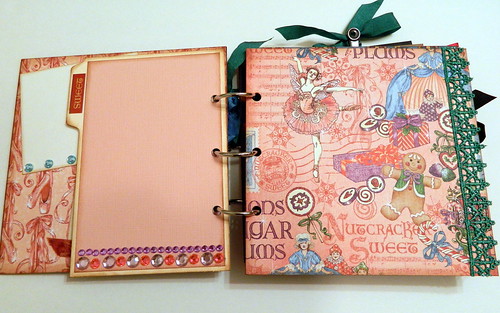
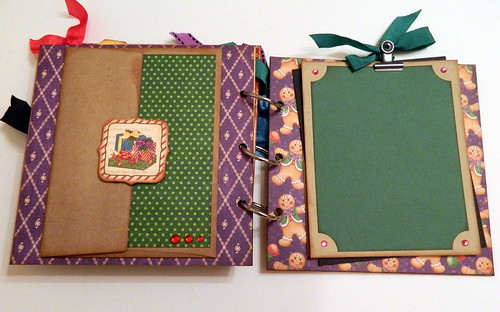
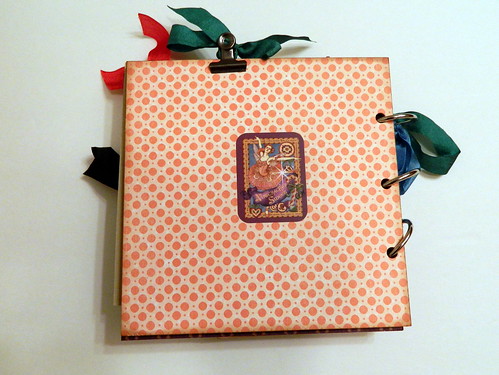
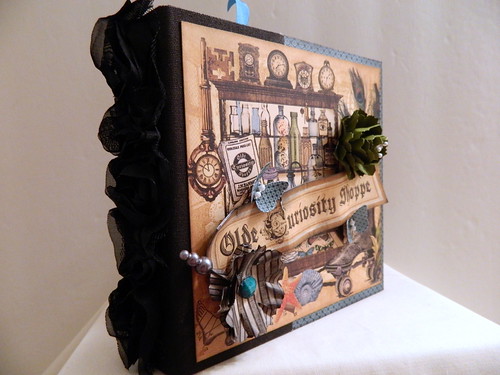
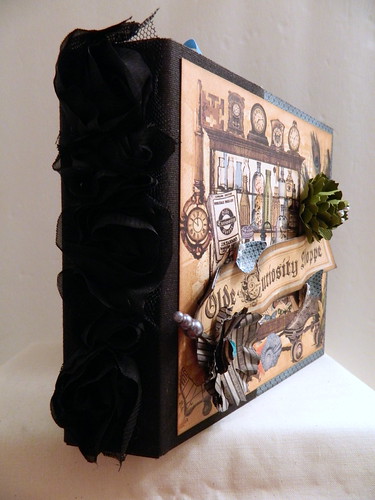
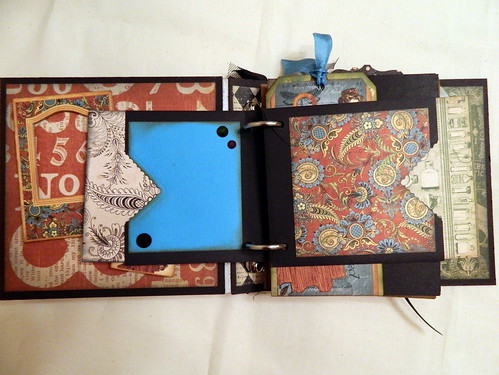
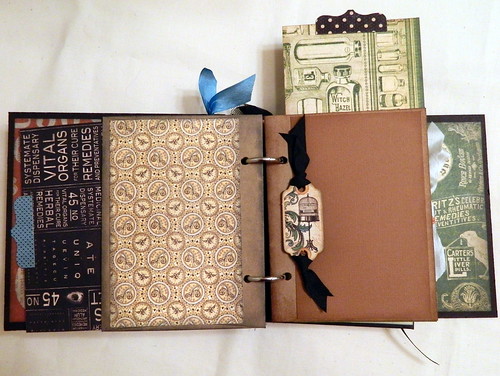
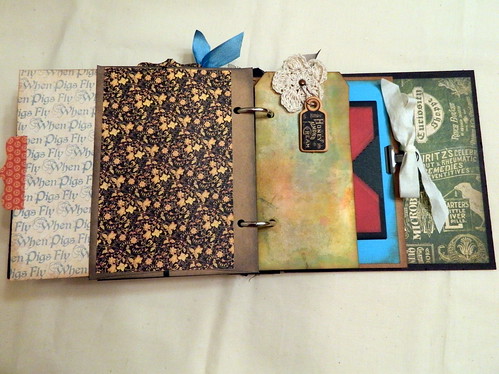
I decided to use rings for my binding this time. On the cover I used one of the chipboard pieces and some display trim corners from 7Gypsies. I tied some ribbon and seam binding onto the rings. I also made a charm using my Epiphany Shape Studio. I chose one the of the gingerbread images from one of the papers. 

Graphic 45 Ring Bound Nutcracker Sweet Mini Album

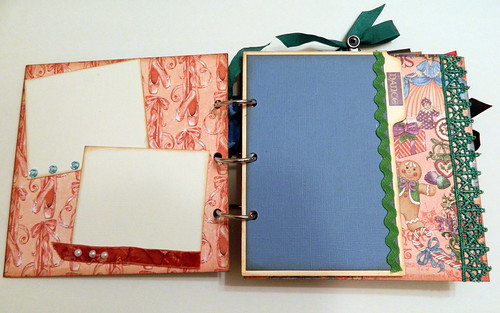
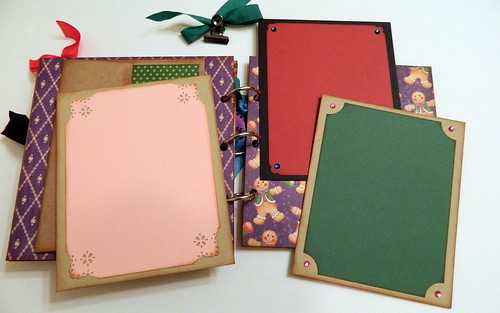
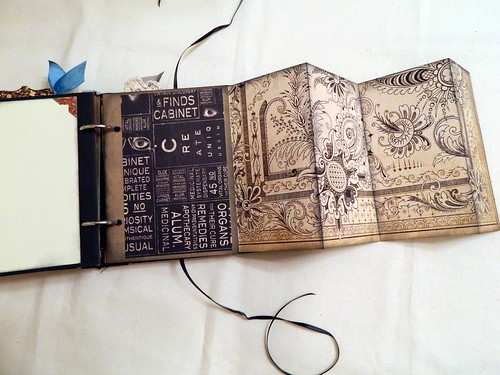
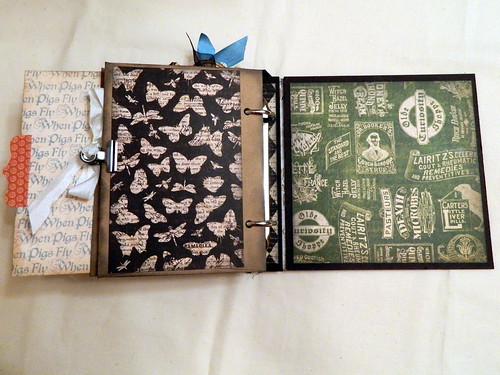
This book has 12 pages which include the inside front and back cover. I've added trim with ribbon from Webster's Pages and Making Memories throughout the book. May Arts Ribbon was also used.

Graphic 45 Ring Bound Nutcracker Sweet Mini Album

Bling from Webster's Pages, Hero Arts, Recollections and Queen & Co were used on photo mats here and there.

Graphic 45 Ring Bound Nutcracker Sweet Mini Album

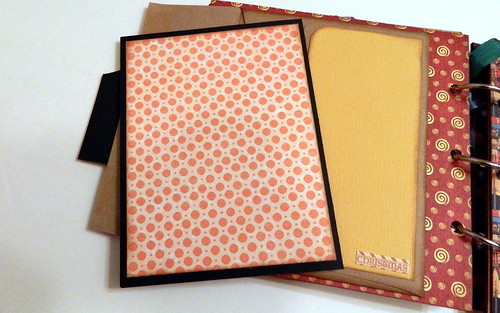
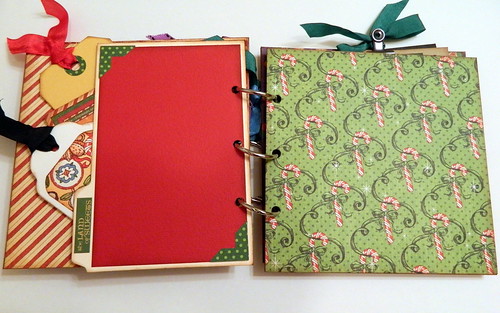
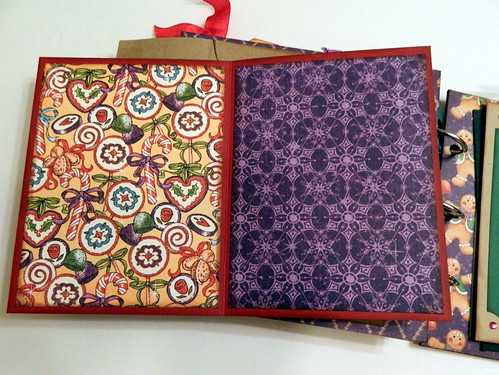
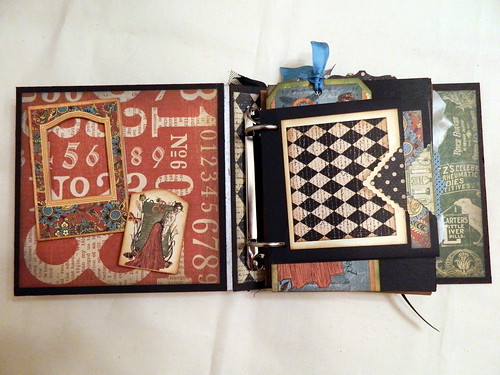
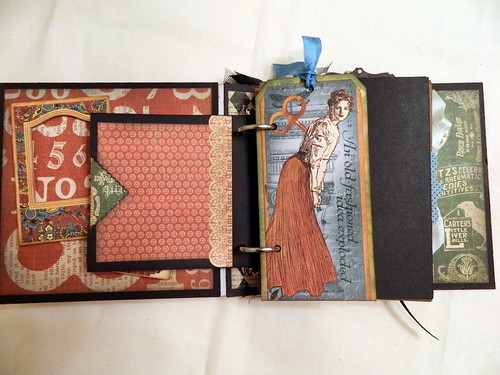
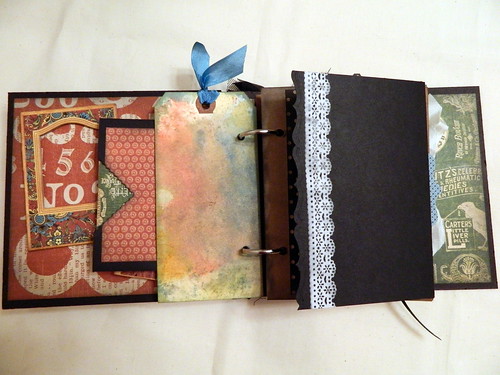
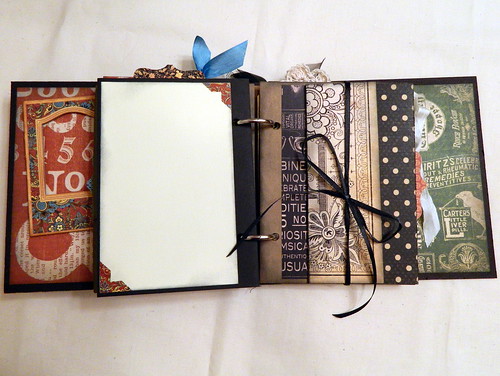
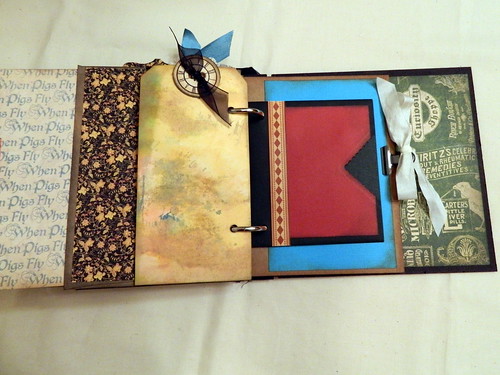
I added two Kraft envelopes with an A2 card inside (4-1/4 x 5-1/2 - inches) for additional room for photos, journaling or memorabilia. The next three photos show the pattern paper on the card.

Graphic 45 Ring Bound Nutcracker Sweet Mini Album

Graphic 45 Ring Bound Nutcracker Sweet Mini Album

Graphic 45 Ring Bound Nutcracker Sweet Mini Album


Graphic 45 Ring Bound Nutcracker Sweet Mini Album

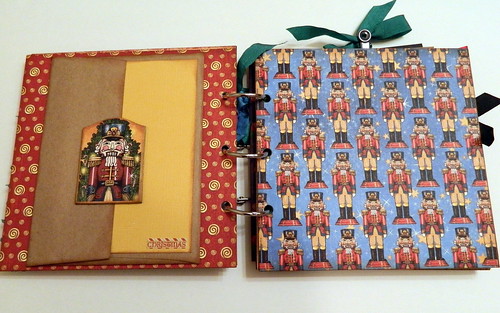
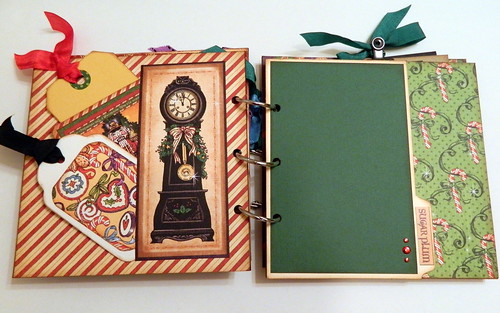
I added a pocket with an images I cut from one of the card stock sheets. Inside of the pocket I added two tags. One made from a Tim Holtz die and the other one from a Sizzix die. 


Graphic 45 Ring Bound Nutcracker Sweet Mini Album

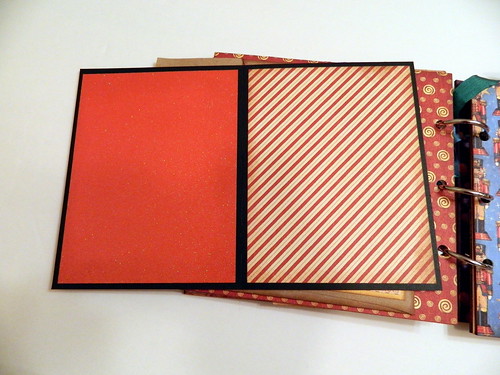
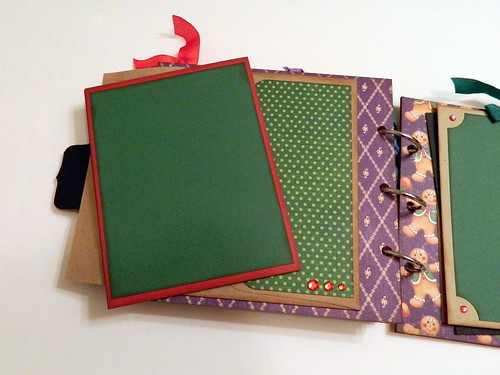
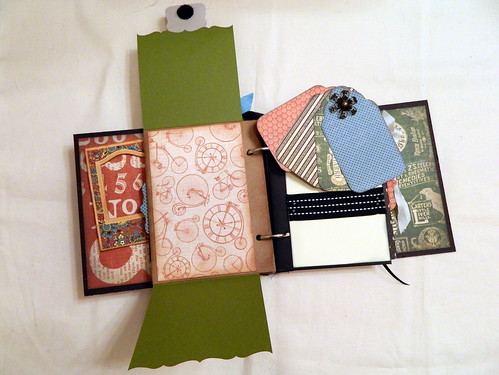
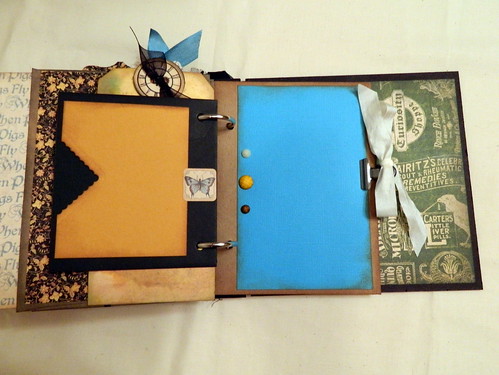
I left some pages blank for larger photos to be added.

Graphic 45 Ring Bound Nutcracker Sweet Mini Album

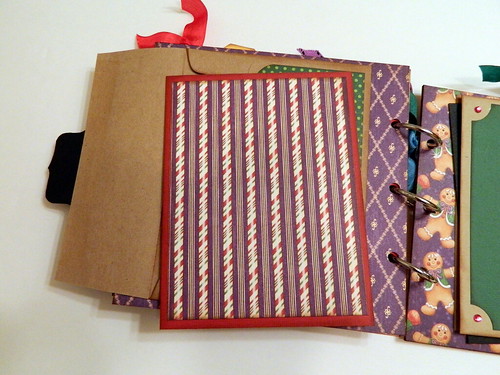
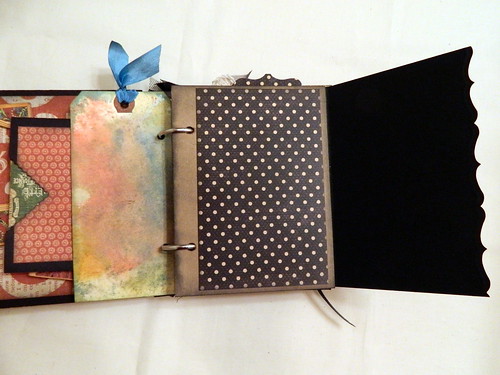
Another kraft envelope and card on the left page. On the right I've added three photo mats measuring 4-1/2 x 5-1/2 - inches for added photo space. A larger photo can be adhered behind the mats. The next four photos show the second card and the photo mats.

Graphic 45 Ring Bound Nutcracker Sweet Mini Album

Graphic 45 Ring Bound Nutcracker Sweet Mini Album

Graphic 45 Ring Bound Nutcracker Sweet Mini Album

Graphic 45 Ring Bound Nutcracker Sweet Mini Album

Graphic 45 Ring Bound Nutcracker Sweet Mini Album

This is the back cover. I just embellished it with a sticker from the collection. This is a very fun collection with very unconventional Christmas colors!

I love making books! I do make so many that I can't keep them all. I have a wall of shelves in my craft room with all the books I can't part with. This book will be for sale here.

I'm planning to post my third 6 x 6 -inch book using this collection tomorrow, so check back if you're interested in seeing it. That one will also be for sale. If everything goes well today I plan to make a video of both books. You can keep checking my YouTube channel here to see when they are posted. 

Thanks for stopping by!

Wednesday, December 5, 2012

Mini Book Swap

Graphic 45 'Olde Curiosity Shoppe' Mini Book

I joined my first ever mini book swap! It was fun making a book for someone else, but it makes me a wreck not knowing if they'll like it. We were able to say which paper lines we liked and other miscellaneous info. We could also choose to create the book in the style that we normally use or in the way they like. I think my book reflects what I usually gravitate to. I've also noticed that having a deadline makes me so nervous! My crafting style is to just fly by the seat of my pants. I'm very happy to report that I finished way ahead of schedule. I also joined a tag and card swap. I'll post more about them later. I mailed my tags ahead of time and am working on the cards now. 

Serena, the recipient of my book said she likes Graphic 45. I was so happy because this manufacturer is one of my favorites! I chose to use their "Olde Curiosity Shoppe" collection. The covers of the book are 6 -inches by 6 -inches. Before I go any further, I'm going to warn you that this post is very photo heavy.

Graphic 45 'Olde Curiosity Shoppe' Mini Book

On the cover I wanted to add some dimension. I made the two flowers using a Tim Holtz die. For the butterflies I used a Martha Stewart punch. I added Glossy Accents to give them a little more stability.

Graphic 45 'Olde Curiosity Shoppe' Mini Book

I used grungepaper behind one of the sentiments that I cut from one of the pieces of cardstock. That made it easier to bend so that I could have it stand out more. On the spine I added some ribbon from American Crafts.

Graphic 45 'Olde Curiosity Shoppe' Mini Book

The back of the cover has an image cut from one of the cardstock sheets.

Graphic 45 'Olde Curiosity Shoppe' Mini Book

Including the inside front and back cover there are 22 pages. There are also some pages that have pockets and some flaps that fold up or out. The pocket pages hold seven mats that pull out to use for more photos or journaling.

Graphic 45 'Olde Curiosity Shoppe' Mini Book

Inside front cover and first page. The chipboard element on the left will hold a photo that is approximately 2 -1/8 inches by 3 -1/4 inches. I used a Tim Holtz two-ring binder for the binding of this book.

Graphic 45 'Olde Curiosity Shoppe' Mini Book

Second and third pages.

Graphic 45 'Olde Curiosity Shoppe' Mini Book

Fourth and fifth pages. I'm counting the tag as a page.

Graphic 45 'Olde Curiosity Shoppe' Mini Book

Sixth and seventh page. On the manila tags I used Tim Holtz distress inks.

Graphic 45 'Olde Curiosity Shoppe' Mini Book

This page holds a flip out and also has a pocket.

Graphic 45 'Olde Curiosity Shoppe' Mini Book

Eighth and ninth pages.

Graphic 45 'Olde Curiosity Shoppe' Mini Book

Pages 10 and 11.

Graphic 45 'Olde Curiosity Shoppe' Mini Book

One page opens up and has a velcro closure. The other one has ribbon across it and holds four tags that can be used for journaling or photos.

Graphic 45 'Olde Curiosity Shoppe' Mini Book

Pages 12 and 13.

Graphic 45 'Olde Curiosity Shoppe' Mini Book

Page 13 has a foldout that will hold photos on both sides.

Graphic 45 'Olde Curiosity Shoppe' Mini Book

Pages 14 and 15.

Graphic 45 'Olde Curiosity Shoppe' Mini Book

Pages 16 and 17.

Graphic 45 'Olde Curiosity Shoppe' Mini Book

Pages 18 and 19.

Graphic 45 'Olde Curiosity Shoppe' Mini Book

Page 20 and the inside back cover.

I did make a second copy of this book. The only things that are different are some of the chipboard pieces. You can see a video of this book here.

I can't wait to share the book that I receive from my partner Kim!

Thanks for stopping by!
09 10