Showing posts with label Recollections. Show all posts

Thursday, December 13, 2018

Christmas Cards 2018

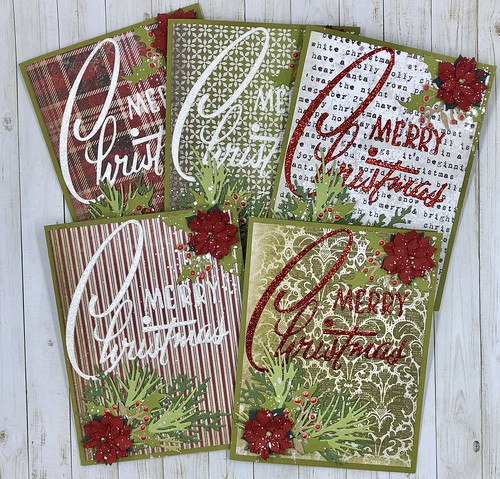
Merry Christmas Wreath

Christmas cards are one of the occasions that I love to create cards for. 

I've downsized my card list considerably. I used to attempt to make every card I sent out different. This year I decided to do something different for me. I created a small amount of one card design and then moved on to another design. 

I created these wreaths but changed up the background paper for each card. I didn't purchase any new Christmas cardstock this year. I just used what I had on hand. All of the cards shown below with the exception of the snowflake cards use Tim Holtz Idea-ology Paper Stash Tidings cardstock. I've had it for awhile and I love it. It's pretty much used up. I'll have to see if I can find another pad of it or see what other Christmas cardstock Tim Holtz has available. I love his products because they are so vintage. 
Merry Christmas Wreath

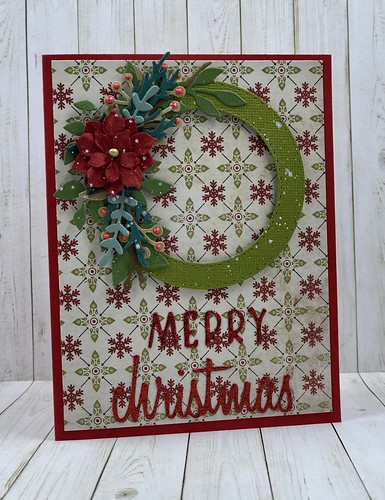
For my wreaths I die cut circles using the Double Stitched Circles from Our Daily Bread. All of the greenery was die cut using Sizzix Thinlits products. I used Tim Holtz Alterations Retro Merry Christmas, Holiday Words: Script - Christmas and Garden Greens. I used some miscellaneous poinsettia's that I picked up last year at Hobby Lobby. 

I did make my own poinsettia's using a Sizzix die. After I had them all together and I had sprinkled some Papericious Frosting Powder on them, I didn't like them. I just set them aside for another project. 

I used glitter cardstock for the sentiments. 

After the wreaths had been assembled I splattered them with Perfect Pearls. This card was my favorite!
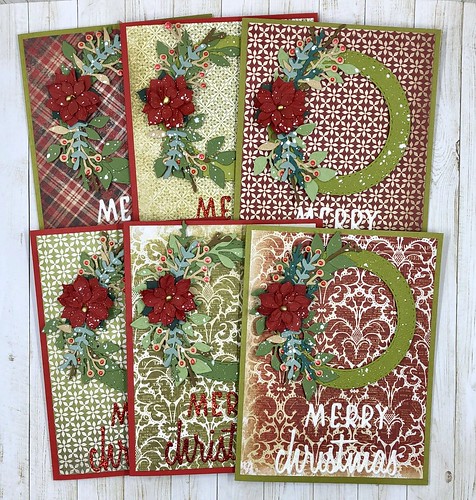
Merry Christmas Wreath

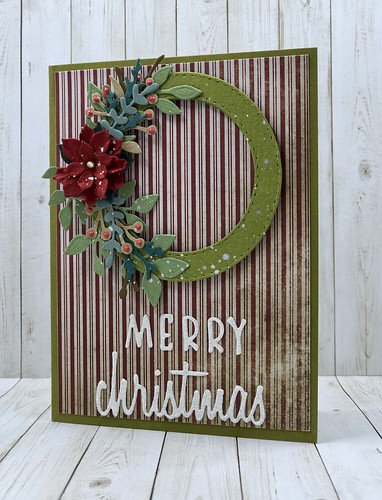
For the next card I used the same paper. 

I heat embossed the sentiments using Hero Arts Gold and Silver embossing powder. 
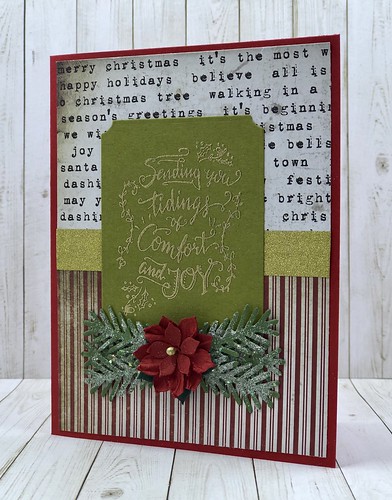
Merry Christmas

All of the sentiments are from the Stampers Anonymous Tim Holtz Mini Doodle Greetings stamp set.

I bought this set and the larger set last year and this is the first time I've used them!

I added a strip of Tim Holtz Idea-ology gold deco tape to each card. 
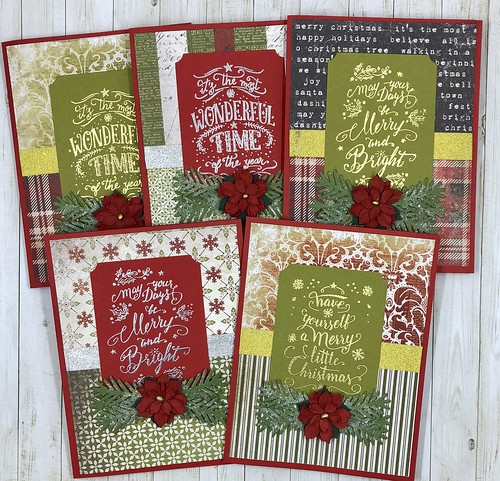
Merry Christmas

For the greenery on my cards I used Concord and 9th's Take A Bough Die. 

I used Rangers Tim Holtz Distress collage medium that I spread on with a brush and then sprinkled on frosting powder from Papericious. I first saw this stuff at a stamp show I went to this past summer at the Heartfelt Creations booth. The poinsettia is from Hobby Lobby. 
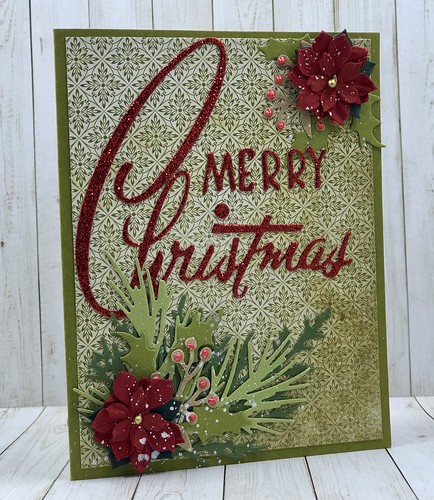
Merry Christmas

This card again uses the same paper as the two cards shown above.

For the sentiment I diecut Merry Christmas using the Sizzix Tim Holtz Alterations Retro Christmas die. The greenery is Holiday Greens and Garden Greenery. The same dies I used above on the wreath card. For both cards I added Ranger Ruby Red Liquid Pearls to the Kraft colored cardstock. I again spritzed perfect pearls over the greenery. 
Merry Christmas

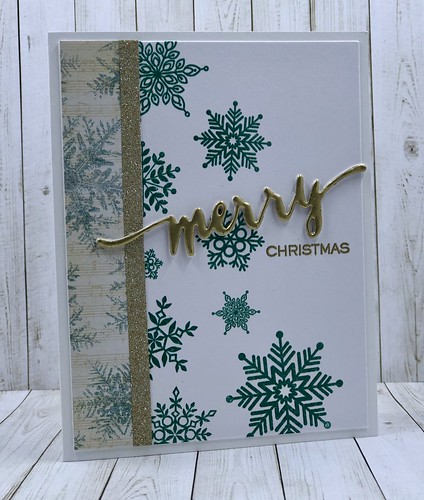
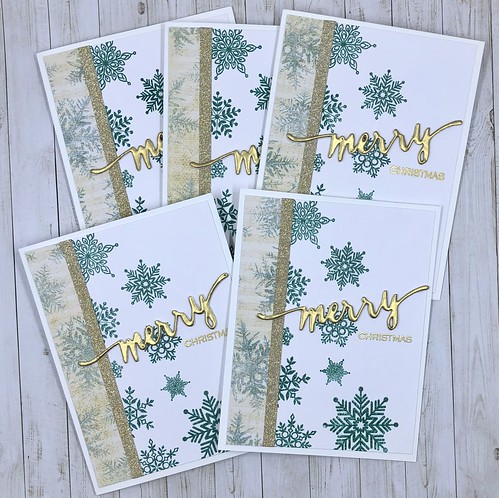
For my snowflake cards I heat embossed snowflakes using the Simon Says Stamp Lots of Snowflakes stamp set. I stamped them with Distress Oxide ink in evergreen bough and then used Hero Arts clear embossing powder. 

I cut a strip of patterned cardstock from a paper pad by The Paper Studio called Old World Winter.

I added a strip of Tim Holtz Idea-ology gold deco tape.
Merry Christmas Snowflakes

The stamp and die are from WPlus9 called Hand Lettered Holiday. 

I cut three Merry die cuts. Using one I added VersaMark several times and kept heat embossing it with Hero Arts gold embossing powder until I was satisfied with how it looked. I then adhered three die cuts together. I then stamped the Christmas sentiment and heat embossed it with gold embossing powder. 
Merry Christmas Snowflakes

I happened to be up in Plymouth last Saturday so I popped into Anchor Paper.

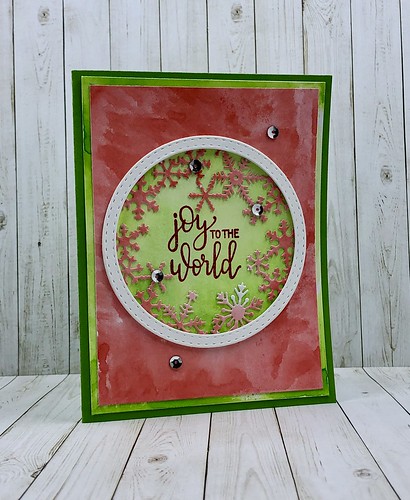
I found this die from Hero Arts called Snowflakes & Ornaments Fancy Die. 

There's another piece to the die so that you can make the snowflake look like an ornament.

I chose not to use that piece for this card. 

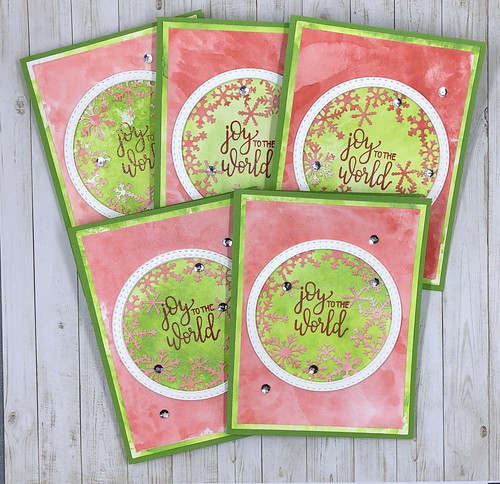
I watercolored two pieces of cardstock. One with Distress ink in candied apple and one in mowed lawn for each card. I die cut the circle snowflake out of the candied apple cardstock and then adhered it to the mowed lawn cardstock. 

I then die cut three circles for each card using white cardstock and the double stitched circles die from Our Daily Bread. After adhering them together I added them to the front of the card piece around the snowflakes.
Joy To The World

I added a few silver sequins to the front of each card and they were done!
Joy To The World

I still have a few cards that I'm working on but this is the majority of the cards I made this year. 

I'll post any others I send out in another post. 

Thanks for taking the time to stop by!


Monday, November 5, 2018

Freshly Made Sketches 361 Challenge

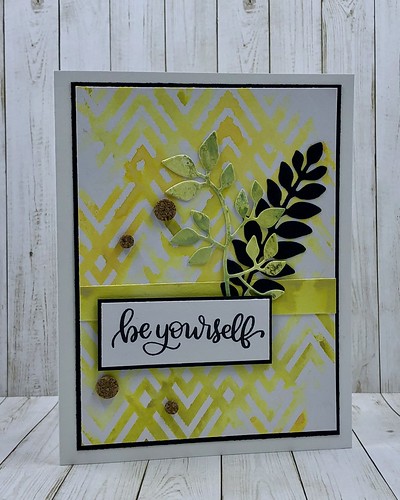
Be Yourself

Another day, another challenge!

Today's card is going to be linked to the Freshly Made Sketches challenge.

The sketch is below and my card is my interpretation of it.


Be Yourself 

Today I'm trying to link all the cards I made at a crop this past weekend to the challenges that are ending in the next day or so. I think right now I have three including this one that I have to link. 

I had to wait until I got home to get decent photos so I could submit them. 

I make a lot of backgrounds when I don't know what I want to do while in my craft room. I usually toss them into a container until I decide if I'm going to use them for a card or die cut sentiments from them. I was able to use a few of my backgrounds this past weekend and create cards!

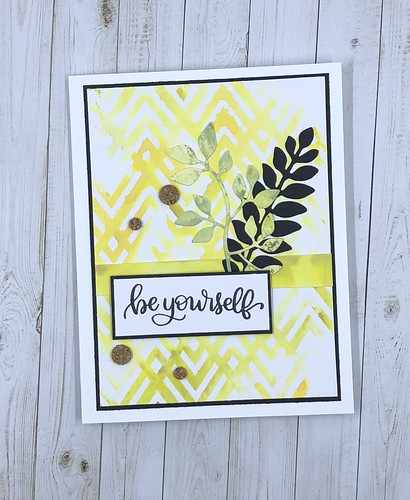
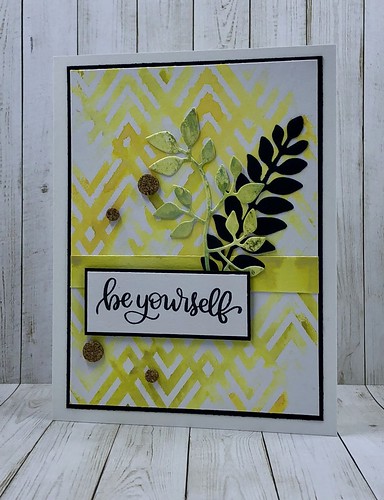
For this card I used a PaperTrey Ink stencil along with distress oxide ink to create a watercolor background. The colors I used were wild honey and crushed olive. 

I die cut some garden greens using a Tim Holtz thinlet die from Sizzix. I've started die cutting more and just tossing them in a container for use on cards at a moments notice. 

The sentiment is from Simon Says Stamp. The set is called Handlettered Encouragement. I love all stamps from Simon Says Stamp. They are one of my favorite companies.

I finished off the card with some cork bling from Recollections. 

That's it! Now on to the next card!

Be Yourself

Thanks for taking the time to stop by!
Sunday, November 12, 2017

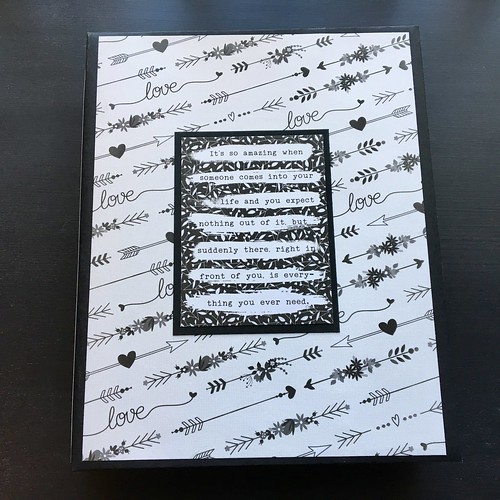
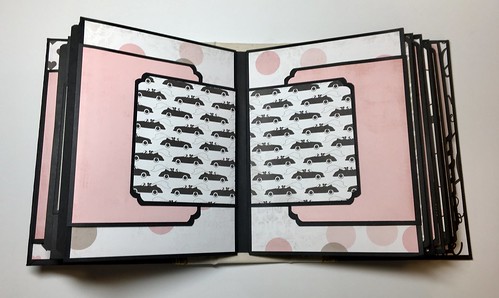
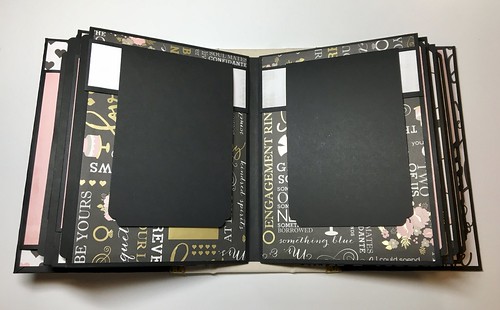
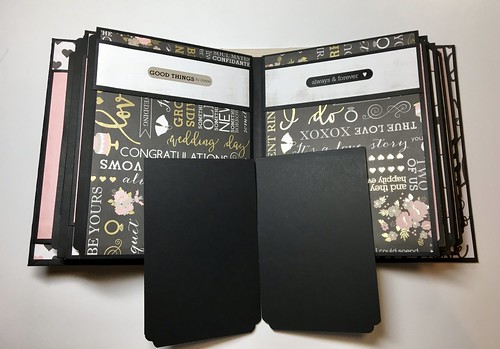
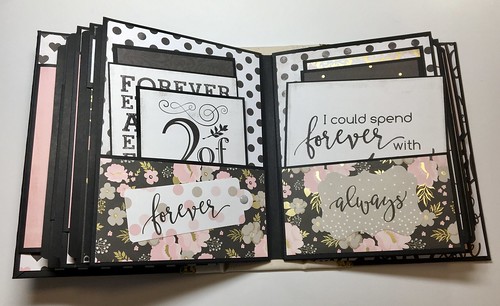
Photo Play We Do Folio

Photo Play We Do Folio 

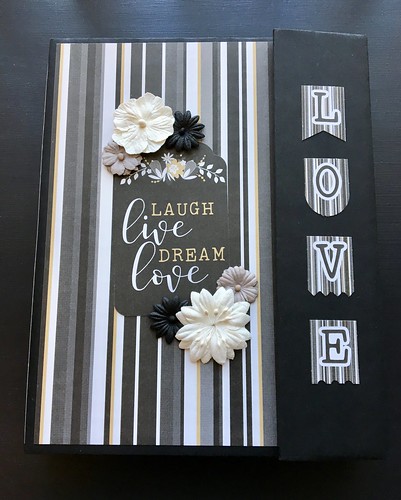
I absolutely adore how this folio turned out! 
The thing I like the most is that my favorite colors - white, black, gray and kraft are in this collection. 
These colors really appeal to me. 

On the cover I used a tag from the collection and hot glued flowers from Recollections around it. 
The paper collection is from Photo Play called We Do. 
I also used some letters from the ephemera pack on the side to spell Love.

Photo Play We Do Folio 

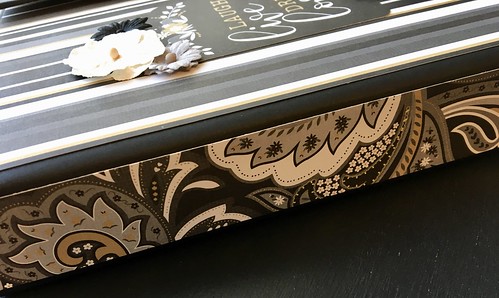
This is the patterned paper I chose for both spines on the outside cover. 

Photo Play We Do Folio 

This is the back of the folio. I used a cut-apart from the collection the I adhered to black cardstock.

Photo Play We Do Folio 

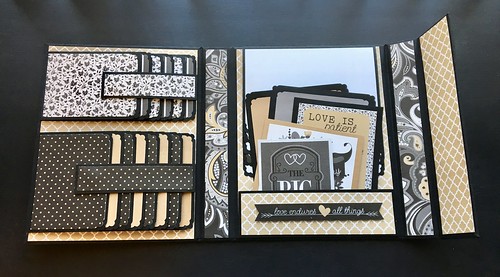
I love the inside of these folios!
There's so much room for photos!

Photo Play We Do Folio 

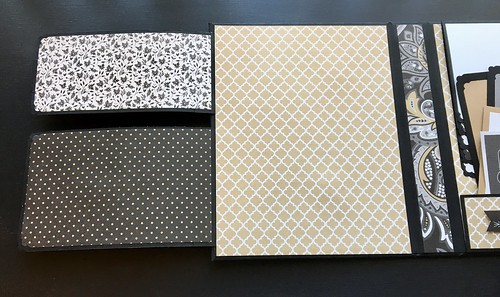
The two waterfalls lift off the page for more room for photos.

Photo Play We Do Folio 

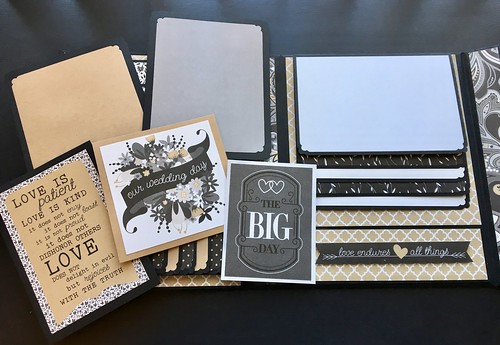
I cut some more cut-parts from the collection and mounted them as photo mats. 
They can also be used for journaling on the back.
They tuck in the pocket.

Photo Play We Do Folio

The waterfall in the middle flips up for more photo space.

I'll be making many more of these. I love them!

Thanks for stopping by!
Saturday, October 21, 2017

Echo Park's Wedding Bliss Mini Album

Echo Park's Wedding Bliss Mini Album 

I finally finished an album that took me longer than it should to complete! The main problem is that I just didn't have as much time as I would have liked to work on it. I had planned to get it done and enter it in the the first Mini Album Makers Challenge in September, but it wasn't meant to be I guess.

This month I'm entering it! The albums that their design team create are just gorgeous! If you're looking for tutorials I encourage you to check out their blog. I didn't do a tutorial for mine this time. I do plan to at some point in the future when I enter one of my books in their monthly challenge. 

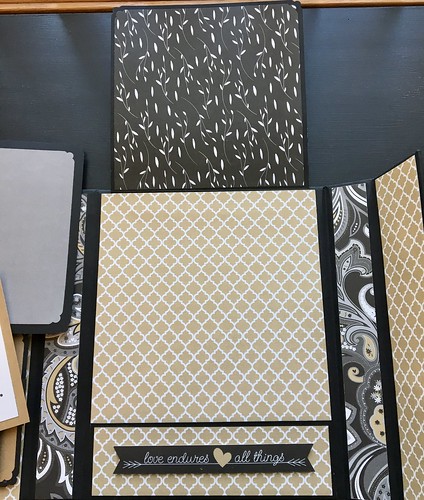
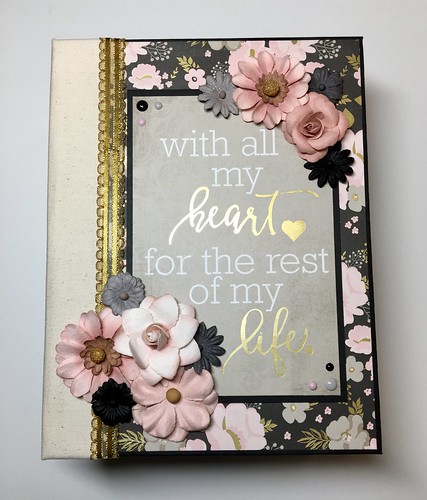
Let's get started! I used the collection called Wedding Bliss from Echo Park. What a gorgeous paper collection this is! The only other supplies I used was the coordinating solids paper pack, the enamel dots, some of the ephemera and some Recollections flowers from Michael's. I also made a smaller album that I will share in a separate post with the rest of the paper that was left. I barely have any scraps left. Some can be used for cards, but I did buy the 6x6 pad and I didn't use any of it so I do have that available to use. 

This album measures 6-3/8 - inches wide by 8-1/4 - inches tall with a 2-3/4 - inch spine. Typically this is the largest album I make. I normally create smaller ones. The album has 12 pages and tons of flaps, waterfalls and and pockets for photo mats. If I had to guess I would say this album will hold over 70 photos. 

For the cover above I used one of the cut-a-parts from the collection. I added some ribbon from my stash, flowers from Recollections and some of the enamel dots from the collection. I like using canvas on my spines. It's from Ranger Ink. Of course the patterned paper is from the collection. 

Echo Park's Wedding Bliss Mini Album 

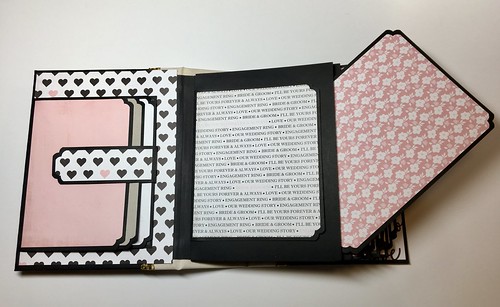
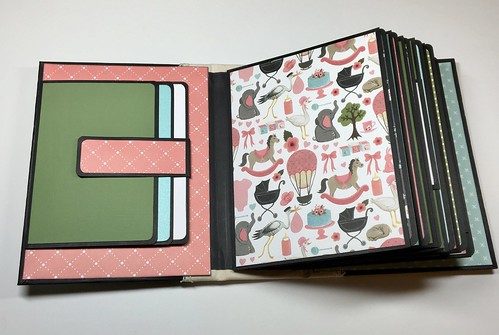
Inside front cover holds a waterfall. Each page has a pocket for a photo mat. The photo above shows the mat that pulls out. I didn't take a photo of each mat. I just used patterned paper on one side of each of the six mats. Each page except for one has either one or two flaps that open. Because it would make this post so photo heavy I didn't take a photo of each flap opened. 

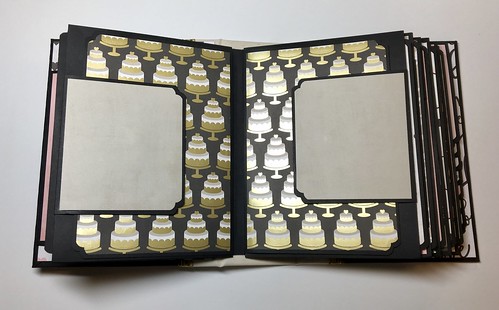
One thing I did in this book was to mirror each page. I've never done that before and thought it would be change of pace for me. 

Echo Park's Wedding Bliss Mini Album 

Echo Park's Wedding Bliss Mini Album 

Echo Park's Wedding Bliss Mini Album 

For this page I added a belly band on each page and the photo mat that holds four photos slips off the band. 

Echo Park's Wedding Bliss Mini Album 

Echo Park's Wedding Bliss Mini Album 

The two pockets hold cut-a-parts that I mounted on black cardstock so a photo can be added on the back.

Echo Park's Wedding Bliss Mini Album 

Echo Park's Wedding Bliss Mini Album 

Echo Park's Wedding Bliss Mini Album 

The back cover holds a waterfall. I always add these because they hold so many photos.

Echo Park's Wedding Bliss Mini Album

I used one of the cut-a-parts for the back cover. 

Thats it! I have entered this book in the Mini Album Makers Challenge for October. Be sure to stop over at their blog and check out all the beautiful mini albums!

Thanks for Stopping by!
Saturday, September 9, 2017

Sympathy Cards

Sympathy Cards

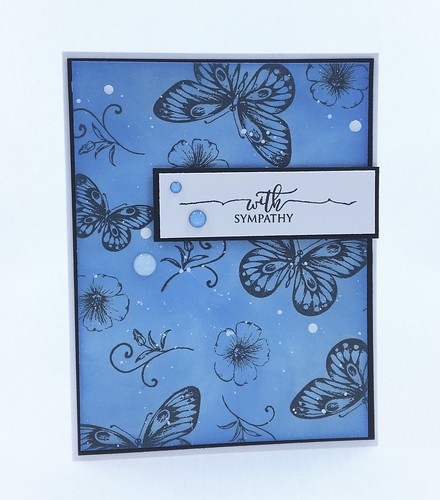
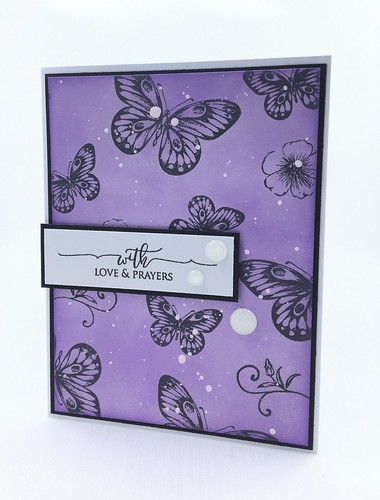
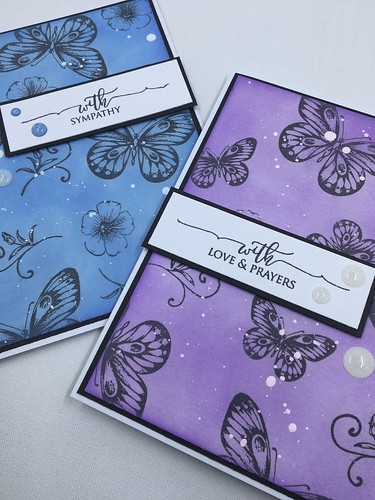
I played around my a stamp set from Gina K Designs called Sending Love for these two cards. I took a 6 in by 8 in piece of white cardstock and stamped all over it with different stamps from the set. When I was satisfied with how it looked I cut it in half and used two different distress oxide inks and just blended them over the whole piece of cardstock. All supplies are listed below. 

Sympathy Cards

I the splatted each panel with Distress Paint.

Sympathy Cards

I love how they turned out! I really need to do this with more of my stamp sets. I have so many that have so many unused stamps. Using more of the set really give you a lot more mileage out of your stamps. 

I'm linking my blue card to these challenges:

Supplies:
Distress Oxide Ink: wilted violet and salty ocean
Gina K Stamps: Sending Love and Scripty Sayings
Distress Paint: picket fence
Versafine Ink: black onyx
Doodlebug Designs Sprinkles: blue jean glitter
Recollections bling

Thanks for stopping by!
Sunday, July 23, 2017

Spread Kindness

Spread Kindness

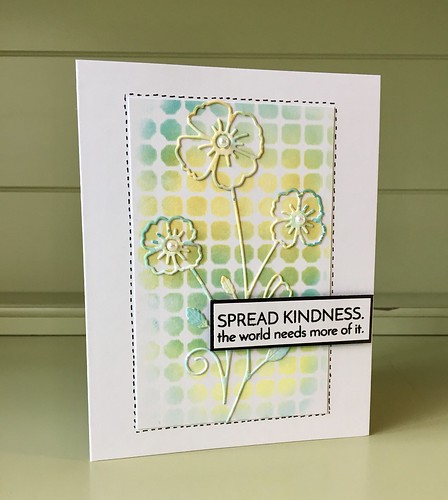
I took the extra panel that I had leftover after creating this card and used it to diecut the flower image for this card. After I diecut the flowers the ink seemed a little light. I added more ink to my craft mat and ran the diecut through the ink to get it darker. For the background I used the same inks with a Tim Holtz layering stencil. I'm constantly losing things in my craft room! After looking for my PITT pen and not being able to find it, I took a Tim Holtz distress marker went around the stenciled image to make dashes. All supplies are listed below.
These cards are linking up to the challenge over at Addicted to Stamps and More ATSM - Anything Goes, Stamping Sensations: July - Anything with Flowers! and the Simon Says Flicker challenge SSSflickrchallenge#76 Anything Goes.


I love that I've had time to participate in a few challenges the last few days. I hope to keep it up. It really keeps the creative juices flowing when surrounded by so much inspiration!

This card is linked to these challenges:
Addicted to Stamps and More: Anything Goes
Stamping Sensations: July - Anything with Flowers
Simon Says Stamp Flickr Challenge: SSSflickrchallenge#76

Supplies used on this card:
Ranger Distress Oxide Ink: twisted citron, fossilized amber, peacock feathers
Recollections : Pearl bling
Simon Says Stamp Stamp Set: Uplifting Thoughts
Memory Box Die: Splendid Clarkia
Stampers Anonymous Layering Stencil: Grid Dot
Ranger Distress Marker: black soot
Hero Arts: Clear embossing powder
Ink: versafine - onyx black

Thanks for stopping by!

Monday, July 10, 2017

Foiled Cards

Foiled Cards 

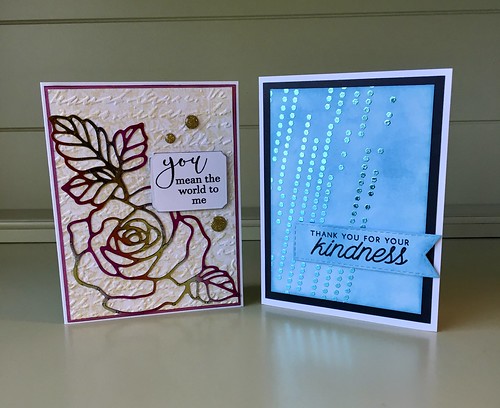
Sharing two cards I created using Therm O Web deco foil.

Foiled Card 

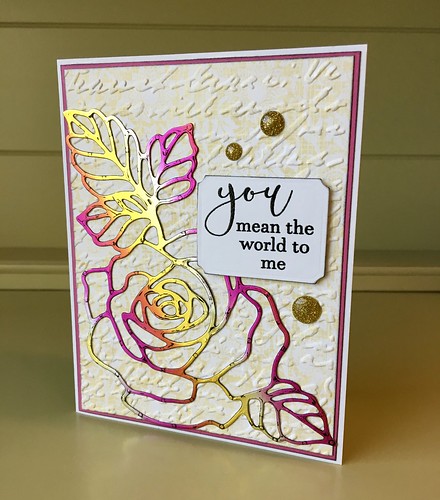
For the card above I used PeelnStick toner sheets from Therm O Web. I have to say I was really late to the party on using foiling on my cards. Actually I wasn't too interested. I took a class last September at the Mall of America that Gina from Gina K Designs hosted and I was hooked! I've followed Gina's blog and watched her videos on Stamp TV since 2008 so it was so nice to meet her. She is just a lovely person and so talented! 

Back to the card....after die cutting the Stampin' Up Rose Garden die with the toner sheet, I ran it through my Royal Sovereign laminator using summer rainbow deco foil. I love how it turned out! There were a few spots where the foil didn't adhere and I was fine with that. I like how that made it look more vintage. I adhered the rose to a panel that I ran through my Big Shot using a Cuttlebug embossing folder called script. The sentiment is from Gina K called All About You. I stamped and heat embossed the sentiment and die cut it using the large labels die from Spellbinders. The bling is from my stash that is from Recollections. 

Foiled Card

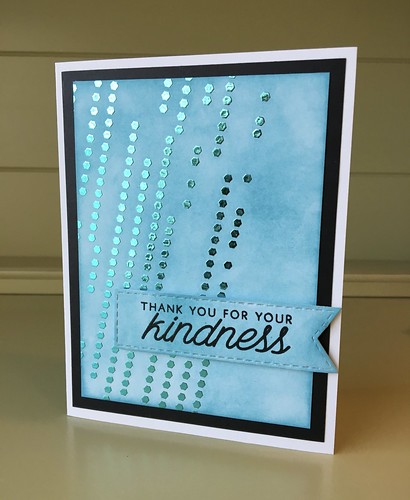
For this card I used Therm O Web's deco foil transfer gel. What a game changer this stuff is! It's so nice to be able to use the stencils in your stash with foil! I smeared it on just like you would if you were applying embossing paste. I then added Therm O Web's aqua deco foil on top and ran it through my laminator. So easy! The sentiment is from Hero Arts called Acts of Kindness that I heat embossed and die cut with Taylored Expressions stitched banner stacklets. The stencil I used is called pixelated from Deco Art. I do like the look and I like the little bit of dimension that you get from using the transfer gel. 

I have made some more backgrounds with foil that I will share later. I haven't decided what sentiments I want to use with them just yet.

Thanks for stopping by!
SaveSave

Tuesday, May 30, 2017

Carta Bella Rock-A-Bye Baby Girl Mini Album

Carta Bella Rock-A-Bye Baby Mini Album

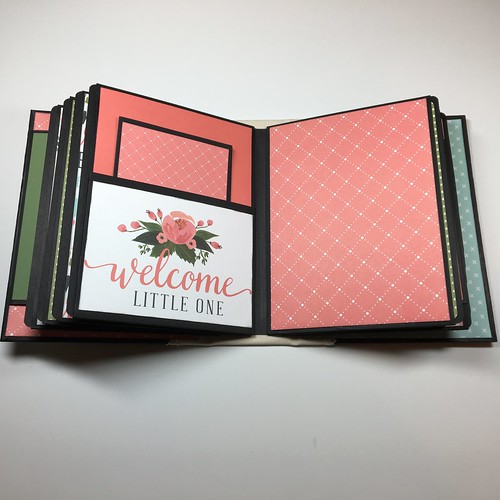
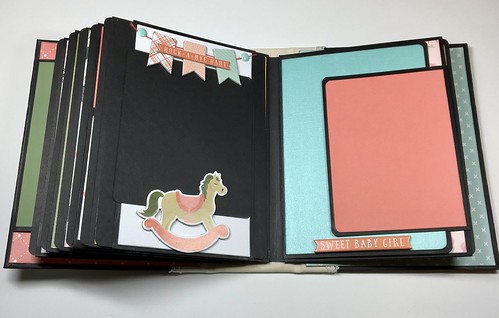
I finished the second baby album I've been working on for my supervisor at work. This one has been created using Carta Bella's Rock-A-Bye Baby Girl collection. Now I can take this book and the baby book I created here so that she can choose which one she likes best. 

I love how the cover turned out! I do like the colors in this collection. Once I started working on the book I was having a bit of a struggle because I didn't think there were enough patterns in this collection. On the backs of some of the patterns there were large cut-a-parts. I went out and matched some solid colors to the collection knowing that I would have to use more solid colors than I normally do when making a book. The further along I got I actually started really loving how it was coming together. I think this one might be a close favorite of mine. 

For the flowers on the cover I shopped my own stash! It's a good think I pick things up when I see them on sale not knowing what they will be used for!

Carta Bella Rock-A-Bye Baby Mini Album

I kept the back and the spine simple. 

Carta Bella Rock-A-Bye Baby Mini Album

Carta Bella Rock-A-Bye Baby Mini Album

I did add a waterfall in the front inside cover. I add waterfalls to all my books. To me it's worth it for the extra amount of photos that can be added. 

Carta Bella Rock-A-Bye Baby Mini Album

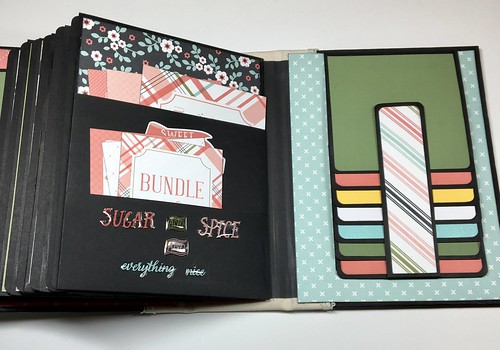
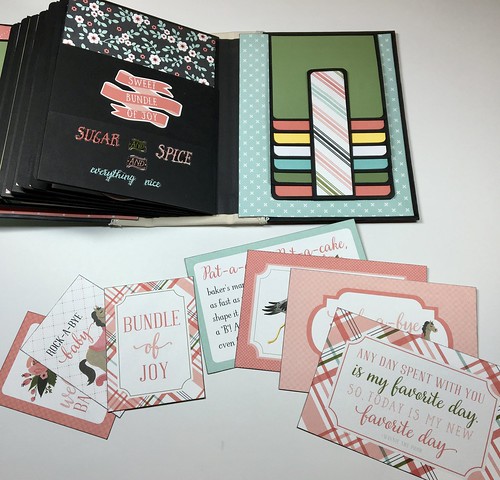
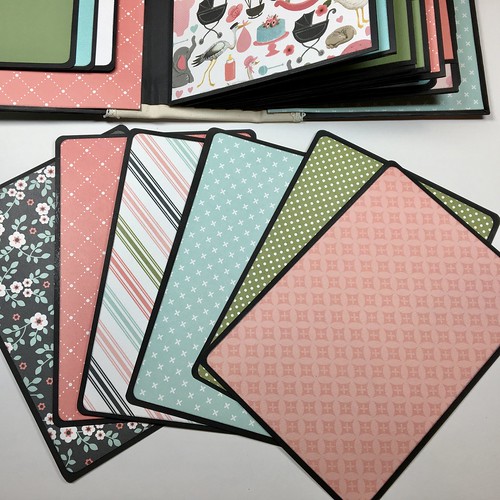
There are six pockets with a mat for each one. I just added patterned paper to one side.

Carta Bella Rock-A-Bye Baby Mini Album

Carta Bella Rock-A-Bye Baby Mini Album

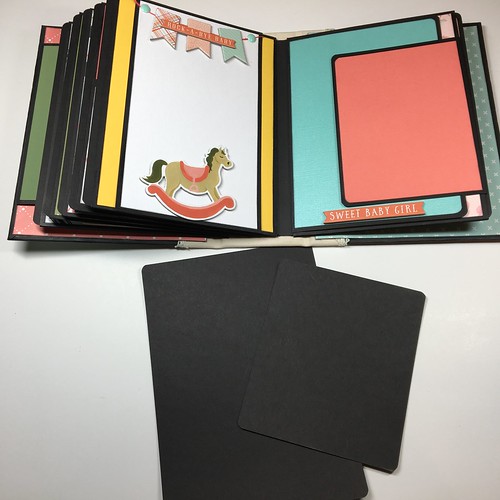
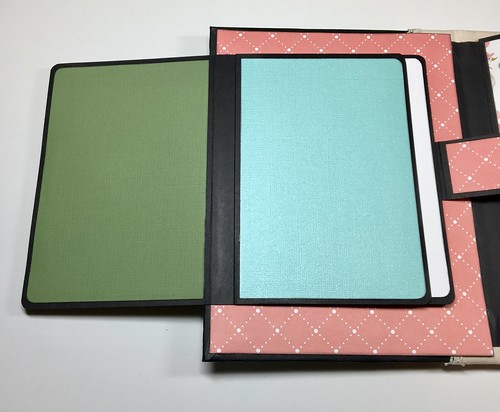
This waterfall has three pages.

Carta Bella Rock-A-Bye Baby Mini Album

I used some of the chipboard elements and stickers to embellish these pages.

Carta Bella Rock-A-Bye Baby Mini Album

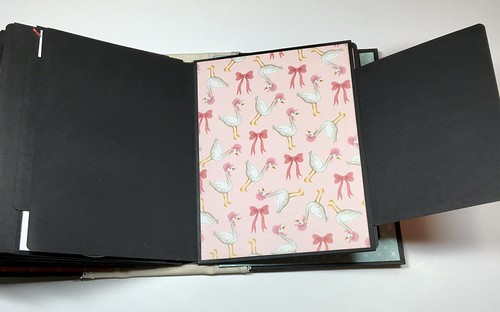
The page has two flaps that open.

Carta Bella Rock-A-Bye Baby Mini Album

I left the back of the flaps black.

Carta Bella Rock-A-Bye Baby Mini Album

Carta Bella Rock-A-Bye Baby Mini Album

More flaps!

Carta Bella Rock-A-Bye Baby Mini Album

Carta Bella Rock-A-Bye Baby Mini Album

I added a pocket that holds a trip-fold booklet. I cut down one of the cut-a-parts for the front of the pocket.

Carta Bella Rock-A-Bye Baby Mini Album

One page has a belly band that holds two mats and one page has two flaps. 

Carta Bella Rock-A-Bye Baby Mini Album

More chipboard embellishments.

Carta Bella Rock-A-Bye Baby Mini Album

Carta Bella Rock-A-Bye Baby Mini Album

Stacked pocket that holds cut-a-parts from the collection. The inside back cover holds another waterfall.

Carta Bella Rock-A-Bye Baby Mini Album

That's it! I hope she likes them! 

Thanks for stopping by!
09 10