Saturday, January 29, 2011

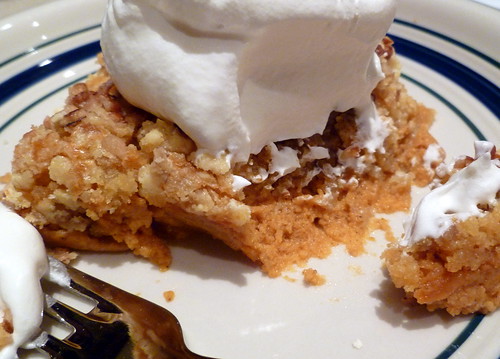
Bobby's Lighter Pumpkin Crunch

Bobby's Lighter Pumpkin Crunch
Oh my gosh! This stuff is fantastic! Whenever it's available at a local deli I always make sure to pick some up. I've wanted to make it myself, but haven't been able to find a recipe for it in any of my cookbooks. I subscribe to Paula Deen's newsletter and I couldn't believe my eyes when I saw it in there the other day! I love it when her son Bobby's lighter versions are included.

I took all the nutritional info and plugged it into my Weight Watchers calculator and came up with 7 PointsPlus per serving. No problem, I thought. Well, when I went to pick up the few ingredients I needed, I couldn't find a sugar-free yellow cake mix anywhere. I reluctantly bought a regular yellow cake mix thinking that the points value would go up. I was wrong. I plugged all the information in the the recipe builder on the Weight Watchers site and the recipe still came in at 7 PointsPlus per serving. I was pretty happy with that!

Bobby's Lighter Pumpkin Crunch*
By Bobby Dean

461 Fewer Calories
47g Less Fat

1 (15-ounce) can pumpkin puree (not pumpkin pie mix)
1 (12-ounce) can fat-free evaporated milk
3/4 cup sugar
1 teaspoon ground cinnamon
2 egg whites
1 large egg
1 (16-ounce) package sugar-free yellow cake mix
1/2 cup chopped pecans
4 tablespoons cold butter, cut into small pieces

Preheat the oven to 350°F. Spray a 9X13-inch baking dish with nonstick spray.

Whisk the pumpkin puree, evaporated milk, sugar and cinnamon in a large bowl until well mixed. Add the egg whites and egg, whisking until well blended.

Scrape the batter into the baking dish. Sprinkle the cake mix evenly over the batter to cover completely. Scatter the nuts and butter pieces over top.

Bake, uncovered until a toothpick inserted in the center comes out with a few moist crumbs attached, 45 to 50 minutes. Cool on a wire rack.

16 Servings
Per Serving: (1/16 of cake) 252 Cal; 5g Protein; 8g Total Fat; 3g Sat Fat; 3g Mono Fat; 42g Carb; 2g Fiber; 13g Sugar; 125mg Calcium; 1mg Iron; 257mg Sodium; 22mg Cholesterol

*Recipe from the Paula Deen Newsletter.

I was invited to link this recipe to Sweets for a Saturday #2! Check out Lisa's blog:


Thursday, January 27, 2011

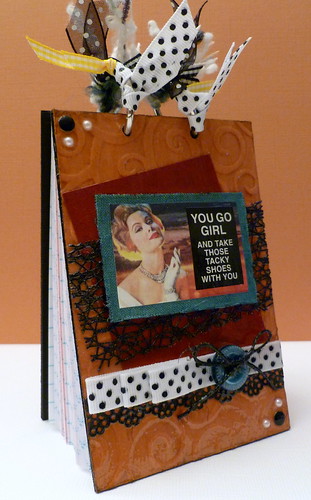
Tacky Memo Pad

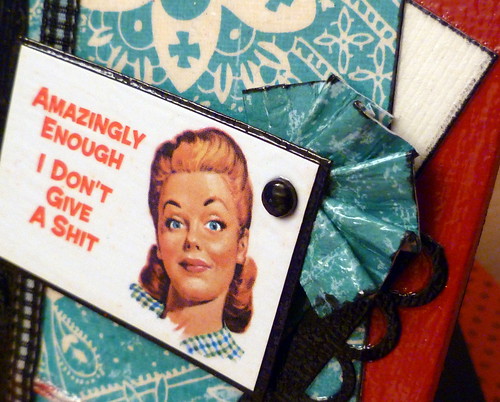
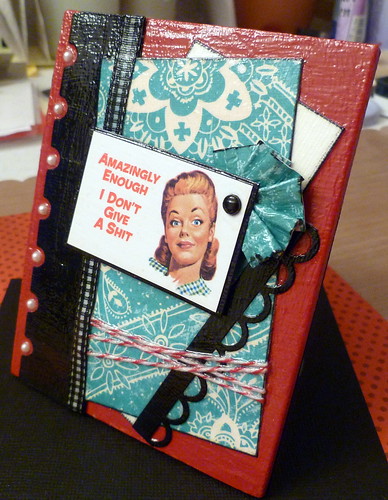
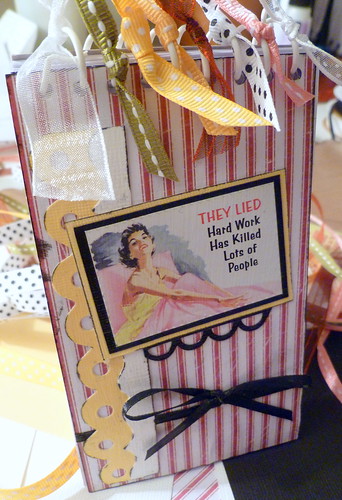
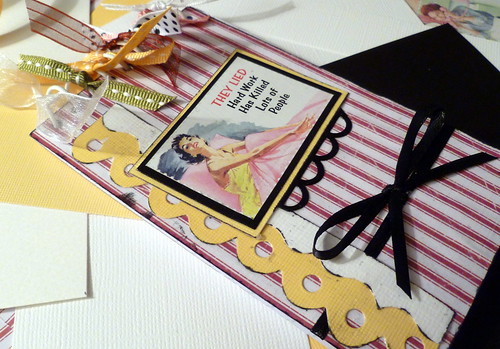
Recently I made a plaque for my daughter's desk at work. I was going to make her another one, but she said she wanted a memo pad like I made here instead.
This is what I came up with:
Tacky Shoes

I was going to bind it together using my Zutter Bind-It-All, but decided to use rings instead. I thought that was a better choice when she runs out of paper. That makes it refillable. She can just cut some (or I can!), punch two holes, insert the paper and it's ready to go.

To make this memo pad I cut chipboard to the size I wanted and then ran it through my Sizzix Big Shot using the Cuttlebug D'Vine Swirls embossing folder. I then covered the chipboard with Gesso and let dry. Using Making Memories acrylic paint, I mixed the colors Spotlight and Nutmeg together and painted over the Gesso. After that dried, I took acrylic paint in Espresso and mixed it together with Mod Podge and painted over the chipboard. I then wiped it off with a baby wipe. When it was completely dry, I wiped Tim Holtz Distress Ink in Vintage Photo over the top.

After I cut the cardstock, sticker and ribbon it was time to assemble all the pieces. I mounted the sticker onto a piece of turquoise SEI Linen. Wow! Do I love the texture of that stuff! Using my distress tool, I roughed up the edges.

I adhered everything to the chipboard with Mod Podge and then covered it with another coat. Once dry, I sprayed it with Mod Podge Clear Acrylic Sealer and added the paper and ribbons.

Here's a closer view:
Tacky Shoes1

My youngest daughter has decided that she'd like a plaque also. I'll probably make her a memo pad too. When they're both finished I'll be sure to share them!

Products Used For This Project:
D'Vine Swirls Cuttlebug Embossing Folder
Chipboard
Gesso
Making Memories Acrylic Paint
Mod Podge & Mod Podge Acrylic Sealer
Tim Holtz Distress Ink
Spiteful & Delightful Stickers
SEI Linen
Creative Imaginations Paper Lace
Hero Arts Pearls & Metallic Decor
Misc Cardstock & Ribbon Scraps

Friday, January 21, 2011

Another Sassy Project!

I used the sassy stickers my daughter gave me to make something for her. I thought this would be perfect for her to sit on her desk at work. She always uses this photo on her Facebook page.
Mod Podged Plaque
Here are the steps I used to make this plaque.....
Plaque
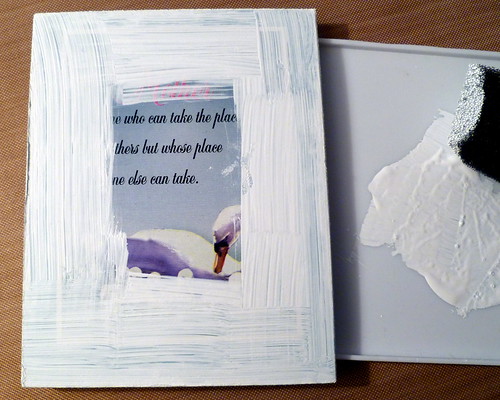
I picked up a cheap plaque.
Gesso
I lightly sanded around the edges and added a coat of Gesso.
Paint
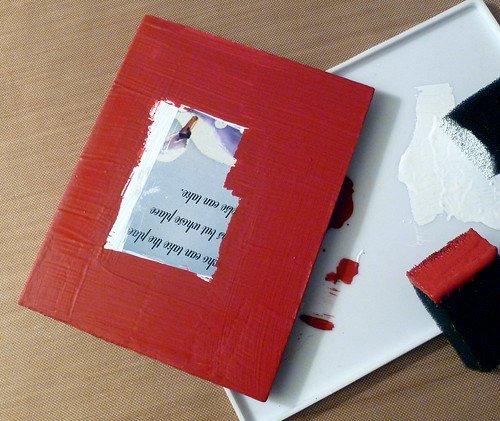
I painted it with some Making Memories Acrylic Paint. I wasn't using the center so I didn't even bother covering it.
Coat of Mod Podge
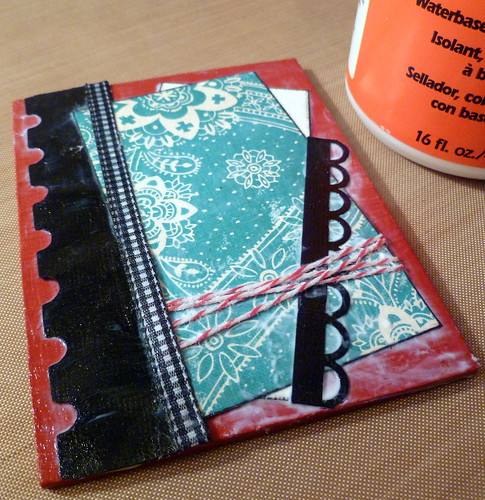
After I figured out my design, I used Mod Podge to adhere everything down. This stuff is fantastic!!
Score
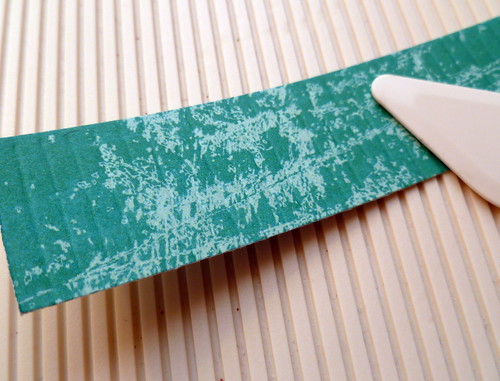
I scored a piece of cardstock to use behind the sentiment. I can't even express how much I adore my Martha Stewart Scoreboard!
Close up
I added this piece to the sticker with a brad, added some foam dots and adhered down. I then added a coat of Mod Podge to the sticker. When it was completely dry, I sprayed on a coat of Mod Podge Gloss Clear Acrylic Sealer to protect it.

Another view...
Side
Now I'll finish the other one I'm making for her. I'll share it when I'm done.

Products Used For This Project: Plaque, Gesso, Making Memories Acrylic Paint, Bazzill Cardstock, BoBunny Patterned Paper, Stickers, Tim Holtz Alterations On The Edge Plaque & Postage Die, Martha Stewart Scoreboard, Ribbon, Mod Podge Gloss Lustre & Gloss Acrylic Sealer, Hero Arts Pearls, Brad, Farmer's Market Twine

Thanks for stopping by!

Monday, January 17, 2011

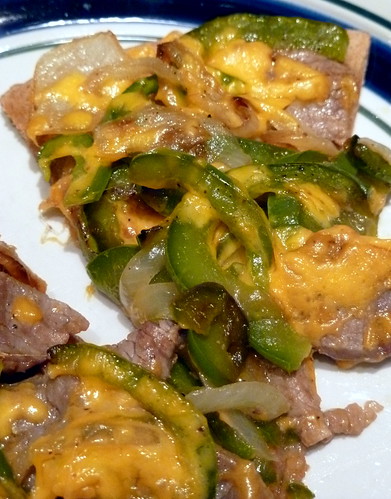
Philadelphia "1st and 10" Cheesesteak Pizza

I found this recipe in a pamphlet attached to the Boboli pizza crust I bought last week when I made the Pizza Margahretta. I knew my husband would like it, so I decided to give it a try.
Philadelphia Cheesesteak Pizza
I figured the Weight Watcher PointsPlus at 8 per slice. I used the 100% Whole Wheat crust.

Philadelphia "1st and 10" Cheesesteak Pizza

1-12" Boboli Original Pizza Crust
2 Tbsp. olive oil, divided
1/2 cup onions, diced
1/2 cup bell pepper, thinly sliced
1 1lb. sirloin steak, sliced
Salt and pepper to taste
1/2 cup mild cheddar cheese, shredded

Preheat oven to 450°F. Add 1 Tbsp. of oil to preheated skillet (high heat). When oil is hot, add onions and bell peppers and saute until lightly browned. Remove onions and bell peppers and reserve. Add remaining oil to hot skillet. Add steak and quickly saute until seared. Fill pizza crust with beef, onions and bell peppers. Salt and pepper to taste. Sprinkle with cheese. Bake 8-10 minutes on a baking sheet in the lower third of the oven. Serve immediately.

We loved it! Next time I may try using chicken and mozzarella cheese to lighten it up even more.

Sunday, January 16, 2011

A Fun Day & A Brownie Recipe Too!

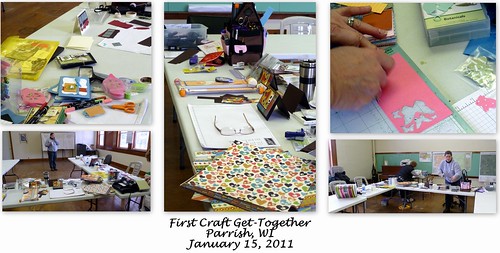
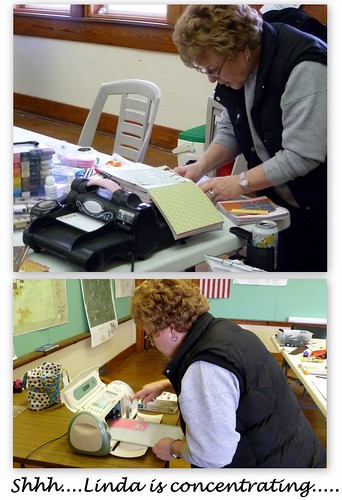
I went to a scrapbooking/cardmaking/craft get-together yesterday. It was our first time and we plan to meet once a month. It's so nice to bounce ideas off of other people and get inspired. I was very flattered that one of the ladies I met, Annette, loved one of my cards and used it as a guide to make some of hers!
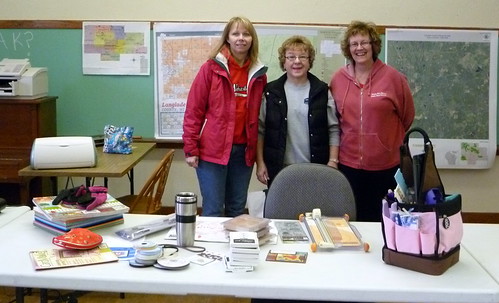
Linda, Me, Annette
We first met at a class at Nosser's in Rhinelander and thought it would be nice to get together on a regular basis. Shown here left to right: Linda, me & Annette. Another lady we met, Dallas, plans to attend beginning in the spring after she gets back from Texas. Annette was able to find a meeting place for us that is fantastic! Lots of space and tables. It's perfect!
Craft Get-Together
Linda
Food Prep
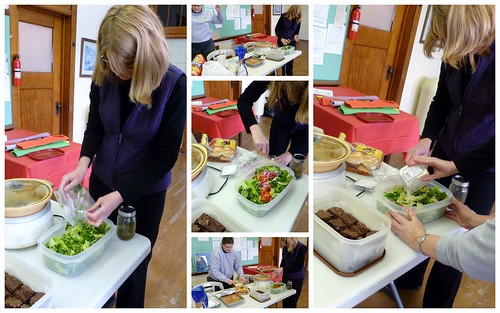
What kind of gathering would it be without food? We're going to do a potluck with one person in charge of the main dish each time.Yesterday, Annette made shredded beef sandwiches and her dad sent along a cheesecake. Both were delicious! To round out the meal,Linda brought chips and Cheetos and Christi brought a wonderful Greek salad. I brought brownies and the recipe is below. 
 
Candy
Someone that shall remain "unnamed" left her candy. So....we ate it!
 
Michelle, Linda, Me
Michelle, Linda and me.
 
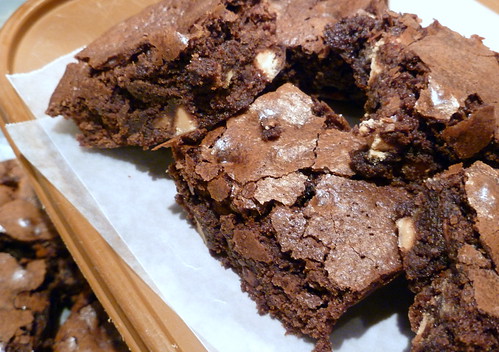
Peanut Butter and Milk Chocolate Chip Brownies
I'm not sure where this recipe came from so I can't give proper credit. They are incredibly rich and chewy.

Peanut Butter and Milk Chocolate Chip Brownies

3/4 cup cocoa
1/2 teaspoon baking soda
2/3 cup butter or margarine, melted and divided (I used unsalted butter)
1/2 cup boiling water
2 cups sugar
2 eggs
1-1/3 cups all-purpose flour
1 teaspoon vanilla extract
1/4 teaspoon salt
1-3/4 cups (11-ounce package) Peanut Butter and Milk Chocolate Chips

Heat oven to 350°F. Grease 13x9x2-inch baking pan.

Stir together cocoa and baking soda in large bowl; stir in 1/3 cup butter. Add water; stir until mixture thickens. Stir in sugar, eggs and remaining 1/3 cup butter; stir until smooth. Add flour, vanilla and salt; blend thoroughly. Stir in chips. Pour into prepared pan.

Bake 35 to 40 minutes or until brownies begin to pull away from sides of pan. Cool completely in pan on wire rack. Cut into squares. Makes 36 brownies.

I was unable to find a bag of peanut butter and milk chocolate chips, so I just purchased a bag of each and used 5-1/2 ounces of each kind.

If your counting Weight Watchers Points, I calculated these at 4 PointsPlus each.

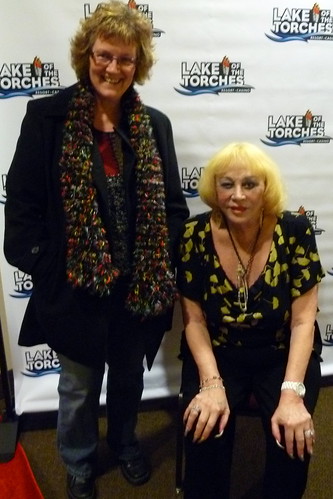
Sylvia Browne
To close out the day, my husband and I went to see Psychic Sylvia Browne. I thought it was an interesting show and I loved the Q&A!

Friday, January 14, 2011

CPS Sketch #200 Challenge

Whew! I'm really trying to get my challenges done a little earlier, but once again I'm down to the wire. I thought I'd just post it tomorrow, but I'll be gone most of the day and all evening. Thank goodness I checked the date or I'd have missed it altogether!

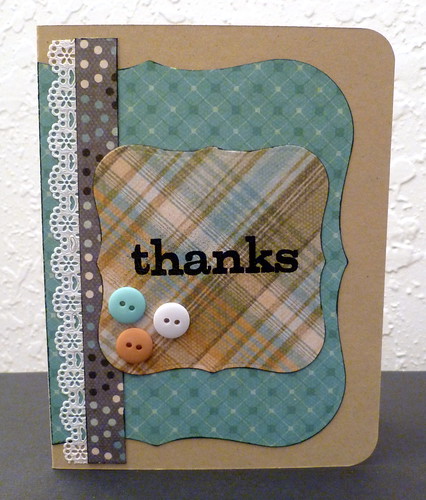
Here's my take on the CPS #200 Challenge:
Thanks (Merry Jan)
I really love this line from We R Memory Keepers. I still have plenty left to create more with it.

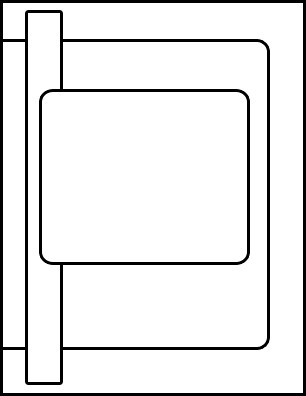
Here's the sketch I followed:
CPS200 1.15.11
Products Used For This Card:
Kraft
We R Memory Keepers Merry January Collection - Branch, Scarf & Chill
Grand Nestabilities Labels One
Nestabilities Labels One
Paper Lace
Embossing Powder/Versamark
Corner Rounder
CPS Sketch#200 Challenge
Hero Arts Stamps - Tree Birds & Messages - CL182

Thanks for stopping by!

Thursday, January 13, 2011

Shake-in-the-Bag Chicken

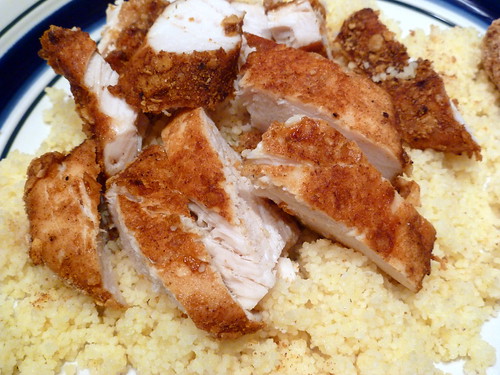
Tonight's menu included this Weight Watcher recipe for chicken. It smelled delicious baking and it had an excellent taste!
Shake-in-the-Bag Chicken
I had it sliced so perfectly to set atop my couscous. It fell apart as I attempted to move it into place, so I just tossed it on top!

I used Mrs. Dash Onion & Garlic & Herb in place of the garlic and onion powder. To cut back the salt, I used a 1/4 teaspoon of Morton Lite Salt which is half the amount of sodium as regular table salt.

Shake-in-the-Bag Chicken *
Makes 4 Servings

2/3 cup cornflake crumbs
1 tablespoon all-purpose flour
2 teaspoons paprika
1 teaspoon dark brown sugar
3/4 teaspoon garlic powder
3/4 teaspoon onion powder
3/4 teaspoon salt
1/2 teaspoon ground cumin
4 bone-in chicken breast halves, skinned (about 2 pounds)

Preheat oven to 400°F. Spray a baling sheet with nonstick spray.

Combine the cornflake crumbs, flour, paprika, sugar, garlic powder, onion powder, salt and cumin in a large zip-close plastic bag. Spray the chicken pieces lightly with nonstick spay, then place one piece in the bag. Shake the bag to evenly coat the chicken, then transfer chicken to the baking sheet. Repeat with the remaining chicken pieces; discard any remaining coating mix.

Bake until a thermometer inserted into the thickest part of each breast registers 160°F, 40-45 minutes.

Per serving (1 breast half): 244 Cal, 5g Fat, 1g Sat Fat, 89mg Chol, 597mg Sod, 11g Carb, 1g Fib, 36g Prot, 28mg Calc. Points: 5 (recalculated to PointsPlus: 6).

* Recipe from Weight Watchers Greatest Hits 250 Classic Recipes from the Sixties to Today

Wednesday, January 12, 2011

Turkey Sloppy Joes

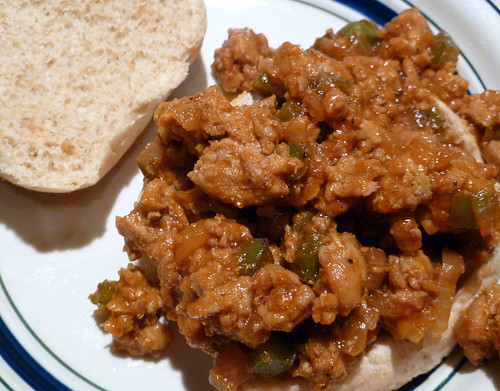
I thought I'd try a new recipe for Turkey Sloppy Joes. Although it was good, I think I'll stick with my old recipe.  
Turkey Sloppy Joes
If you like Barbecue sauce, you'll love them. I don't care for the tangy taste of it. The Weight Watchers Points include a roll. I used a lower calorie wheat hamburger bun which is 2 Points.

Turkey Sloppy Joes *
Makes 4 Servings

1 tablespoon canola oil
1 medium onion, finely chopped
1 green bell pepper, finely chopped
2 garlic cloves, minced
1 teaspoon chili powder
1/2 teaspoon dried oregano
1/2 teaspoon dry mustard
1 pound ground skinless turkey breast
1 cup prepared barbecue sauce
4 multigrain hamburger rolls

Heat a large nonstick skillet over medium heat. Swirl in the oil, then add the onion, pepper and garlic. Cook, stirring occasionally, until softened, about 5 minutes. Stir in the chili powder, oregano and mustard; let cool 1 minute.

Add the turkey and cook, stirring to break up the meat, until no longer pink, 3-4 minutes. Stir in the barbecue sauce and cook until slightly thickened, about 2 minutes. Remove from the heat and serve on the hamburger rolls.

Per serving (1 roll with 3/4 cup meat) 356 Cal, 10g Fat, 2g Sat Fat, 67mg Chol, 813mg Sod, 33g Carb, 4g Fib, 32g Prot, 86mg Calc. Points:7 (recalculated PointsPlus: 9).

* Recipe from Weight Watchers Greatest Hits 250 Classic Recipes from the Sixties to Today

Monday, January 10, 2011

Card Patterns Sketch 97 Challenge

I'm pretty excited that I was able to get a card created for a challenge before the deadline! It seems I can never accomplish that lately. Sometimes I think I'm busier now than when I was working!

This one was designed for the Card Patterns Challenge. You can check out all the beautiful cards from the design team here.
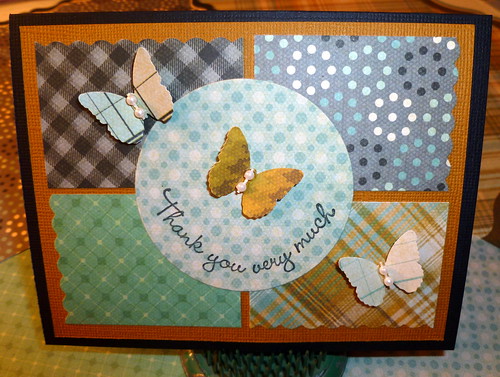
Here's my take on the sketch.......
Thank You Very Much
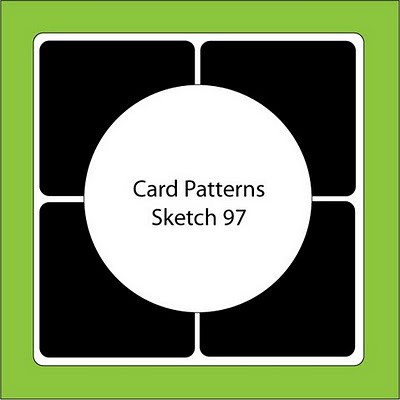
and here's the sketch........
Card Patterns Sketch 97

This Merry January Collection from We R Memory Keepers is fantastic! In order to fit the Hero Arts sentiment into the circle, I manipulated it into a half circle. For the pearls on the butterflies, I used a strand I had bought well over a year ago. I just cut six off and used two on each center.

Products Used For This Card:
Bazzill
We R Memory Keepers - Merry January Collection - Ice, Branch, Scarf, Chill, Slush & Twig
Nestabilities Standard Circles Small
Hero Arts Stamps - All Occasion - CL272
Pearls
Martha Stewart Butterfly Punch

Thanks for taking the time to stop by!

Saturday, January 8, 2011

Pizza Margherita

I was flipping through a Weight Watchers cookbook called Greatest Hits 250 Classic Recipes from the Sixties to Today and I came across this recipe for Pizza Margherita. It was delicious!
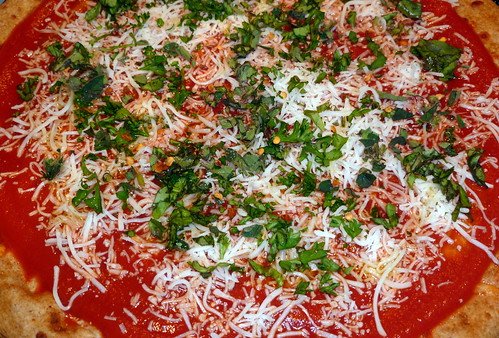
Here it is ready for the oven.....
Pizza Margherita (WW) Oven Ready
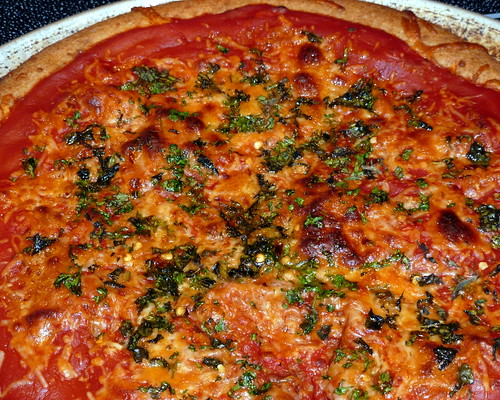
.....and ready to enjoy!
Pizza Margherita (WW) Ready To Enjoy
I used fresh herbs rather than dried. I had planned to make my own pizza dough, but ran out of time. Instead I used a Boboli Whole Wheat Thin Pizza Crust.

The Weight Watcher Points for one serving were 5 points. Under the new plan each serving is 7 points.

Pizza Margherita

Dough for 1 pizza or 1 prebaked thin pizza crust
3/4 cup prepared fat-free tomato sauce (I used no-salt)
1/4 cup shredded part-skim mozzarella cheese
2 teaspoons olive oil
1 tablespoon chopped flat-leaf parsley
1/2 tablespoon chopped oregano, or 1/2 teaspoon dried
1/2 tablespoon chopped basil, or 1/2 teaspoon dried
1/4 teaspoon salt
1/8 teaspoon crushed red pepper

Preheat the oven according to the directions for the crust you are using.

Spread the tomato sauce evenly over the crust; sprinkle with the cheese. Drizzle with the oil, then sprinkle with the parsley, oregano, basil, salt, and pepper. Bake until the cheese is bubbling, 10-15 minutes. Serve at once.

Per serving (1/4 pizza); 256 Cal, 6g Fat, 1g Sat. Fat, 4mg Chol, 681 mg Sod, 41g Carb, 2g Fib, 8g Prot, 76 mg Calc: Points: 7 (recalculated from 5).

Friday, January 7, 2011

I'm Into Thank You Cards.....

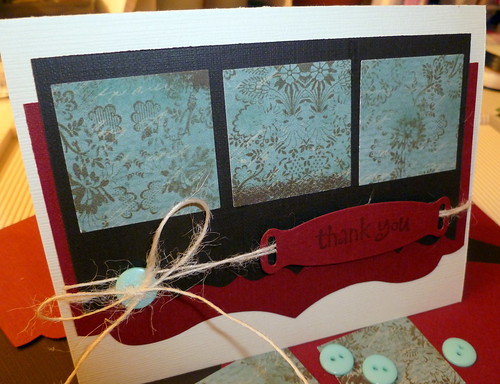
It's the time of year when most people are creating Valentine cards. Not me....oh no! I think I was traumatized last year making them. My thought this year is, if I need one I'll buy one! I've moved on to Thank You cards. These are one of my favorite to make.
Thank You (TPC Studio)
This "Grandma's Attic" paper line from TPC Studio is such a fun one. I really like the colors in the collection. For this card I used "Timeless Memories".

Products Used For This Card:
Bazzill
TPC Studio - Grandma's Attic - Timeless Memories
Tim Holtz Alterations On The Edge Die - Brackets
Creative Memories Square Punch
Shapeabilities Ribbon Tags Trio
Amuse Ribbon
Buttons
May Arts Twine
Hero Arts Stamps - Everyday Sayings - CL342

Thanks for stopping!

Thursday, January 6, 2011

Sympathy Card

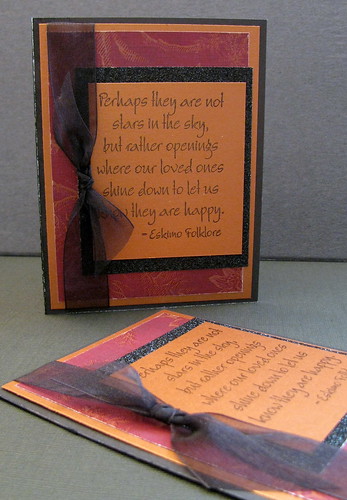
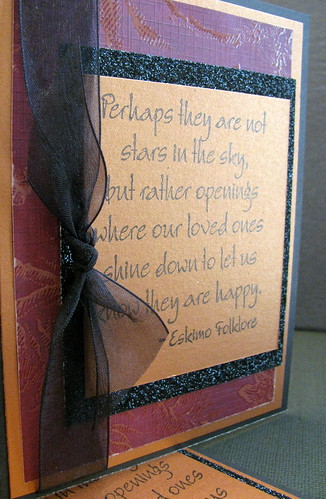
Today I thought I'd share with you a sympathy card I made in December. I had to come up with two cards and this is the design I created. 
Eskimo Folklore Sympathy
I used a stamp from Rubber City Rubber Works. Their stamps are fantastic! I just tear up when I read this sentiment, it gets me every time.
Eskimo Folklore Sympathy2
The patterned paper is from G.C.D. Studios and is called "Thru The Woods" from the "Joyful Peace Collection". I also used Jetsetter Black from Reminisce.

Thanks for taking the time to stop by!

Tuesday, January 4, 2011

Mod Podged Memo Pad

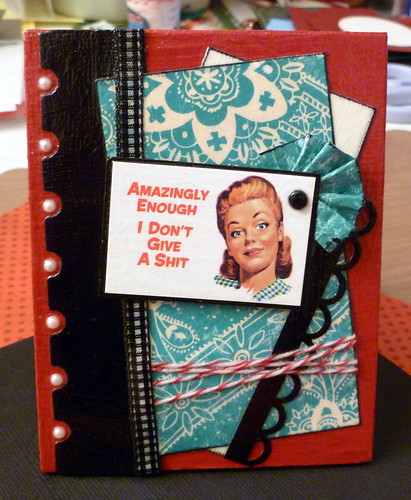
If you're having a bad day, don't you think you should make something fun? I certainly do! My daughter gave me some sassy stickers about two years ago. She knows how much I like them and that I have a weird sense of humor. One is called "Spiteful and Delightful" and the other is "Alpha Bitch". They are perfect these little notebooks!
Mod Podged Memo Pad2
After adhering all the pieces I used Mod Podge to seal it. This stuff is so much fun, I use it for everything! This is another great project for using up your scraps.

Mod Podged Memo Pad

Be prepared to see more of these embellished notebooks and other items I find to use these stickers on. There are a couple that I may not even be able to post because they may be a little over the top!

Products Used For This Notebook:
Memo Pad
Patterned Paper From G.C.D. Studios - Applique From Homespun Chic Collection
Sassy Stickers
Scrap Paper
Tim Holtz Alterations On The Edge Dies - Brackets - Scallops
EK Success Open Scallop Punch
Mod Podge

Monday, January 3, 2011

Winter Wishes

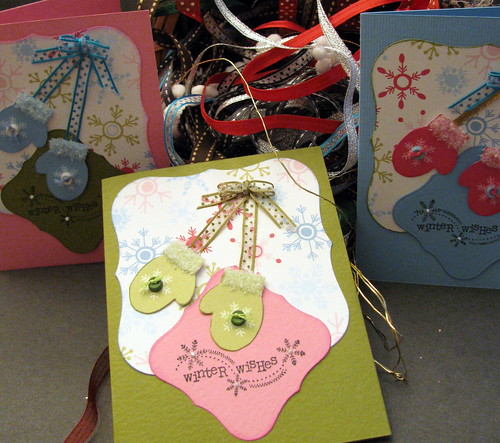
This is my final Christmas card to post for the season. The sentiment for this one was a freebie! I picked up a copy of a craft magazine and the stamp from Unity Stamp Company was included. I can't name the magazine, because I can't remember which one it was!
Winter Wishes Mittens
I didn't use my mittens nestabilities die for this, I did fussy cutting from patterned paper by 3BugsInARug. I think I must have been having insane moment! I just adore that Flower Soft cuff!

Products Used For This Card:
Bazzill
3BugsInARug Patterned Paper - Snow Much Fun
Nestabilities Labels One
Viva Pearl Pen
May Arts Ribbon
Memento Ink
Floss
Unity Stamp
Flower Soft

I hope you're having a great start to your week. Thanks for stopping by!

Sunday, January 2, 2011

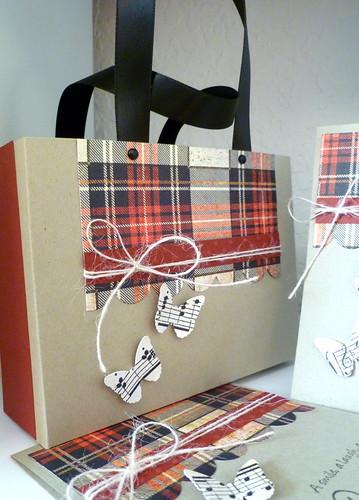
Tote With Four Cards

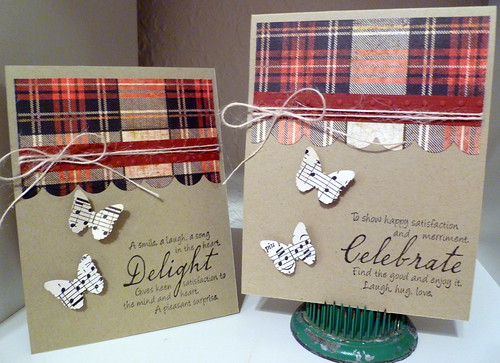
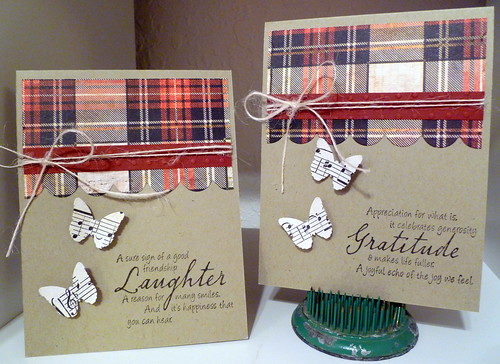
I'm so pleased with the way this tote bag and four cards turned out! I used a Hero Arts Stamp Set called Inspiring Messages for the sentiments. The patterned paper is all leftover scraps from Christmas cards. What a great way to use paper that might otherwise get tossed. The Kraft cardstock paired beautifully with the plaid.
Tote With Four Cards
Delight - Celebrate
Laughter - Gratitude

I kept it simple by not adding any bling to the middle of the butterflies....but I was tempted!

Products Used This Set...
Hero Arts Rubber Stamps - Inspiring Messages - LL240
Kraft
Grand Nestabilities Scalloped Squares
Scraps of BasicGrey - Jovial - Merry Maker
Teresa Collins - Noel
Sizzix Swiss Dots Embossing Folder
May Arts Jute
Martha Stewart Butterfly Punch
Brads
Ribbon

Saturday, January 1, 2011

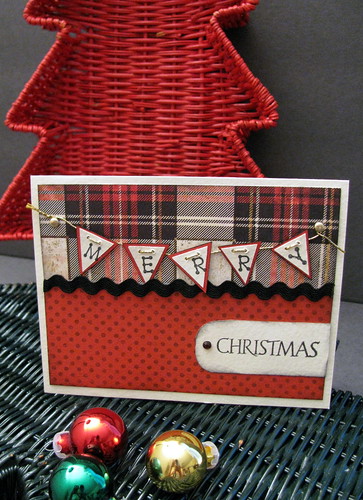
Merry Christmas Banner

This is my second to last Christmas card to share. I promise. Hopefully I can keep that promise, but this kind is my favorite to create.

I used plaid patterned paper from BasicGrey that I adore! 
Merry Christmas Banner
For the sentiment, I combined two different stamp sets. The "Merry" is from The Classic Rubber Stamp Mini's Alphabet Set. The "Christmas" used Hero Arts Holiday Sayings Clear Stamps Set.

This is the card I sent to my sister and brother-in-law who live in the Twin Cities. I hope they liked it!

Products Used For This Card:
Bo Bunny - Harvest Dots - Patterned Paper
BasicGrey -Jovial - Merry Maker - Patterned Paper
"Merry" from The Little Classic Rubber Stamp Mini's Stamp Set
"Christmas" from Hero Art's - Holiday Sayings - CL343
Memento Ink - Tuxedo Black
Ric Rac
Gold Twine
Brads
09 10