Showing posts with label Claudine Hellmuth. Show all posts

Saturday, April 19, 2014

Unscripted Sketches #253 - You Are Simply The Best....Thank You

First off, thanks to everyone who played along with the Unscripted Sketches Blog-iversary Sketch this past week! We really appreciate it!

Congratulations to Pam! She is the winner of the Hero Arts Sympathy Stamp Set! Please contact me by 6 pm Sunday, April 20th with your mailing information. If I don't hear from you I will choose another winner. Here's what Pam said:

"Great stenciling! What a lovely card. Congrats on your 5th year. I've subscribed to your blog via email for a long time and follow on FB. Would love to win this set. Sympathy cards are often so hard to make (shared on on my blog -http://pamspaperandink.blogspot.com/2014/04/with-love-sympathy.html recently). Love the sentiments in this set."

I also want to let you know that this will be my last week as a member of the Unscripted Sketches Design Team. I've had a great time the last five months creating a card from their sketches each week and am grateful that I had the opportunity.  Now for my interpretation of this week's sketch!


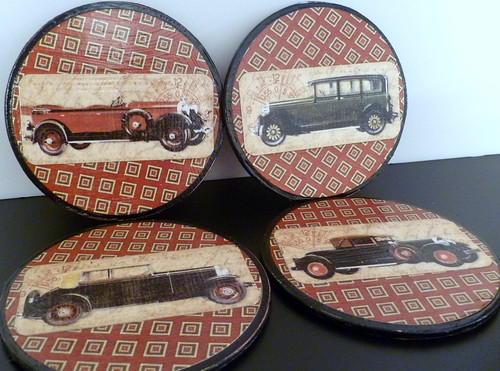
I can't resist creating with kraft, black and red.....ever!

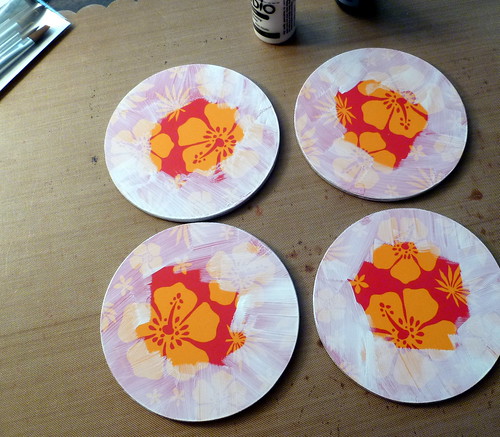
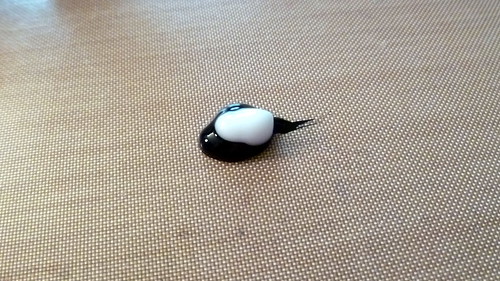
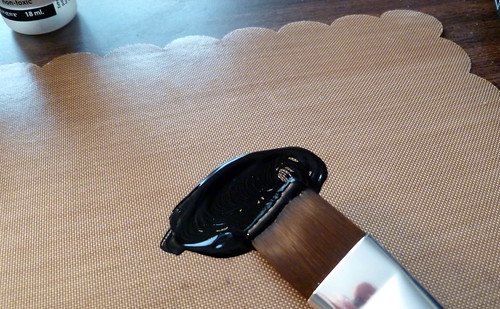
I am so in love with stencils! For this card I used the Tim Holtz Burlap Layering Stencil. Instead of using ink I chose to use Claudine Hellmuth's Studio Black Gesso. Love that stuff! 


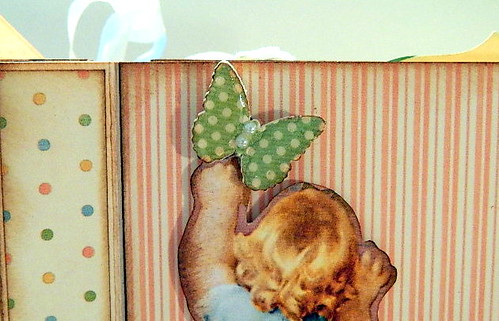
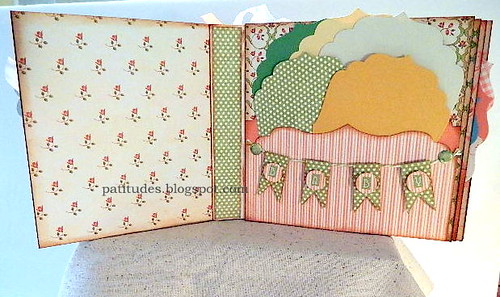
The pennants are called Nested Pennants from Spellbinders. These cute little dimensional butterflies are by Recollections. 


I used a Technique Tuesday stamp set called Mama = Love by Ali Edwards for my sentiment and finished the card off by adding some sequins. I sure have a ton of those. When you buy a package you get a million! I better start using them more so I can make a dent in my stash of them :)


Be sure to stop by out check out all the other Design Team Members Blogs:

Henna
Patty - that's me!
SarahKaye

Hope you'll join us this week with your take on the sketch above. All the details are on the blog post over at Unscripted Sketches!

Products Used For This Card:
Base Cardstock - PTI 
Ink - Ranger Archival - Jet Black
Stamp - Technique Tuesday - Mama=Love by Ali Edwards
Spellbinders - Nested Pennants
Mixed Media - Claudine Hellmuth Studio Black Gesso
Butterflies - Recollections
Stencil - Tim Holtz Burlap Layering Stencil
Misc - Sequins

Wednesday, August 29, 2012

Graphic 45 Christmas Tags


I'm anxiously awaiting my new Christmas collection of Graphic 45 patterned paper to arrive! It's called Nutcracker Sweet. While I'm waiting I'm using up my scraps from the Christmas Emporium collection to make some tags and cards.


I used an EK Success punch called open scallop for the border on this tag. On Santa's beard, cuffs and the snow I used Stickles for a little sparkle.


I bought a poinsettia die from Taylored Expressions and I love it! I did a little scoring on the petals to add a little dimension. I used liquid pearls on this tag.


I used another EK Success punch for the border on this tag. I've also added some Stampendous dot sparklers and some liquid pearls for dimension along with stickles for sparkle.


I just can't get enough glitter! On this tag I used stickles on the holly leaves and Claudine Hellmuth's studio paints on the berries. For the edge of the tag I used the bracket on the edge die from Tim Holtz.

Tags are fast becoming one of my favorite paper craft items to create. It's really hard to have a favorite though as I love creating cards and mini albums also.

Below are some of the items I used to create these tags. I've also linked this post to these parties: Inspiring Creativity, Saturday Showcase, Whatever Goes Wednesday

Thanks for stopping by!


Thursday, August 16, 2012

Little Darlings Baby Girl Mini Album

Graphic 45 Little Darlings Baby Girl Mini Album 

I've had this paper line for quite awhile but I haven't been able to start any projects with it. I finally finished the first album! I absolutely think this is one of the best collections that Graphic 45 has designed. I love it! That's actually surprising since I'm not really a pastel person and I'm not a big fan of the color pink. I generally work with darker colors.

Graphic 45 Little Darlings Baby Girl Mini Album 

 There are twelve pages including the inside of the front and back covers.

Graphic 45 Little Darlings Baby Girl Mini Album

There are two pockets on the inside cover that hold three photo mats plus a little booklet. 

Graphic 45 Little Darlings Baby Girl Mini Album

Inside the booklet the new parents can record all the new baby's information. There's also a place to record who the book is from.

Graphic 45 Little Darlings Baby Girl Mini Album

I tried my hand at fussy cutting. I need to keep practicing. I was so nervous I would ruin what I was cutting.

Graphic 45 Little Darlings Baby Girl Mini Album

I used a Martha Stewart punch for the butterfly. I added a little Glossy Accents and used foam dots to give the butterfly stability and dimension.

Graphic 45 Little Darlings Baby Girl Mini Album 

 There are two pockets on the left page that hold five photo mats. I hand cut the little banner and added some letter stickers from the collection. I used Candi legless brads on each side. I used Tim Holtz distress ink in peeled paint on the brads.

Graphic 45 Little Darlings Baby Girl Mini Album 

 I used some trim I had in my stash on this page. This pocket on the right holds three photo mats. I've adhered some of the stamps from the collection to the top of the pocket.

Graphic 45 Little Darlings Baby Girl Mini Album 

More fussy cutting. I tried to leave at least one page open that didn't have pockets or any embellishments on it. That way there is more room to add larger photos.

Graphic 45 Little Darlings Baby Girl Mini Album 

 The final two pages. The pocket holds five photo mats.

Graphic 45 Little Darlings Baby Girl Mini Album 

This is the back cover. I added some of the images from one of the cardstock sheets. I used Claudine Hellmuth's sticky back canvas for the binding. I painted the canvas using her Studio Paints in Painterly Pink and Blank Canvas. I also decided to wrap a ribbon around the book to help keep it shut since it's so chunky.

Graphic 45 Little Darlings Baby Girl Mini Album

I used a Tim Holtz D-Ring on the binding to hold ribbon. I also attached one of the chipboard pieces as a charm.

Graphic 45 Little Darlings Baby Girl Mini Album 

 Here's another view of the book.

Graphic 45 Little Darlings Baby Girl Mini Album

I learned how to do this binding from two different classes I took at Scrapfest last year. I combined what I learned in the Tim Holtz and the Authentique class. I changed it up a little by adding pockets on the inside front and back covers.


This book will be for sale in my Etsy store. Thanks for stopping by!

Wednesday, August 1, 2012

Graphic 45 Christmas Chipboard Album


This is my last mini album using Graphic 45's Christmas Emporium Collection. I thought I was completely out of this paper and then I found an 8 x 8 paper pad that I had barely used. I really love this line, but I'm anxious to use the new line that will be available soon.


I used a different way of binding this time. I usually use rings or my Cinch or Bind-It-All. I used Claudine Hellmuth's Sticky Back Canvas around the spine of this book. I spritzed the canvas with Tattered Angels Glimmer Mist in Peppermint Stick and Olive Vine. I then added a spritz of Perfect Pearls Mist in Heirloom Gold. I added a Tim Holtz D-Ring and a Christmas charm.


I love chunky books!


There are ten pages including the inside of the front and back cover.


I used the Tim Holtz Rosette Die for the flower.


There are six inside pockets.


The pockets hold fourteen photo mats throughout the book.


This pocket also folds out and there are two additional photo mats.


Here's the back view.


This is a view from the top.

This post is linked to these parties: Crafty Bloggers Showcase, Inspiring Creativity, Whatever Goes Wednesday

Thanks for stopping by!


Wednesday, December 28, 2011

Mod Podged Car Coasters

Mod Podged Car Coasters

I gave this set of coasters I made to my brother for Christmas. He liked them so much that he asked me to create a set of six using another image for him.

Mod Podged Car Coasters

I found these coasters for a steal of a price, but I needed to make them a little more presentable!

Mod Podged Car Coasters

My first step was to cover the edges with Claudine Hellmuth's Studio Gesso.

Mod Podged Car Coasters

I then added some of Claudine's Charcoal Black Studio paint and some Extra Time Studio Slow-Dry Medium onto my craft sheet.

Mod Podged Car Coasters

I swirled them together with one of my brushes. I bought the whole set of Ranger brushes at Archiver's and I love them!

Mod Podged Car Coasters

I painted over the gesso with the Studio charcoal black paint. I didn't need to paint the whole coaster because I knew I was going to cover the center with cardstock. I added two coats of paint and made sure it was completely dry before starting the Mod Podge process.

Mod Podged Car Coasters

Before I started my project I chose what patterned paper I wanted to use. This is an older collection from Graphic 45 called "On The Boulevard & Haberdasher" from the "A Proper Gentleman" collection. I love all of their collections! I don't care how old any patterned paper is that I use from any manufacturer. I use whatever fits what I'm creating at the time and what I like. Since I'm a paper hoarder, I have to use what I have!

Mod Podged Car Coasters

I gathered all my supplies to start the Mod Podge process. That handy dandy roller on the top right in the photo is actually something I bought years ago from Pampered Chef. It's supposed to be used to rolling out pizza dough. I think I used it once! One day I needed something to smooth out a project and well, the rest is history! It's become a handy tool in my craft room. I use it alot!

Mod Podged Car Coasters

This is where you have to work quickly because you don't want the Mod Podge to dry. First I spread a layer of  Mod Podge onto the coaster.

Mod Podged Car Coasters

I added it to the back side of the paper I was putting onto the coaster.

Mod Podged Car Coasters

I smoothed the paper on the coaster. I didn't cut my paper to go to the edges since I wanted the black to show. Once the paper was on, I added another coat of Mod Podge.

Mod Podged Car Coasters

I then added the car I had trimmed out and another coat of Mod Podge.

Mod Podged Car Coasters

You can see where it's starting to dry in this photo.

Mod Podged Car Coasters

All four are ready to completely dry.

Mod Podged Car Coasters

I wanted to rough up the edges a little, so I sanded them.

Mod Podged Car Coasters

I sanded them so that the original color would start to peek through. You couldn't even tell that it was pink. After the coasters were completely dry, I sprayed them with a clear acrylic sealer from Plaid.

I love working with Mod Podge! Coming up in another post is a canvas I made for one of my daughters for Christmas.

I hope everyone is enjoying the holidays!

Products I used for this project: Purchased coasters, Claudine Hellmuth Studio Paint, Gesso & Extra Time, Graphic 45 Patterned Paper - A Proper Gentleman Collection: On The Boulevard & Haberdasher, Mod Podge.

This post is linked to these parties: Made by you Monday, Tip Me Tuesday, Whatever Goes Wednesday
09 10