I finally finished this album!!
This baby album took a little longer than I anticipated. My cousins wife saw a baby girl album I made about three years ago. She asked me if I would make one for her son when they had a baby. They are having their first baby in June. I got it finished in plenty of time.
When you are working on a project and you only have an hour (if even that) at night after work and weekends to work on it, it seems like it takes longer than it should to finish it. I cannot wait for the day when I'm either not working or working part-time so I have more creative time!
I followed a tutorial from Your Book of Memories for this book. I did do a few things a little differently but that's the beauty of tutorials. They are just a guide and you can make whatever your working your own. I want to give a big shout out to Frances from Your Book of Memories because she is an excellent teacher! I will be making more of these books in different themes.
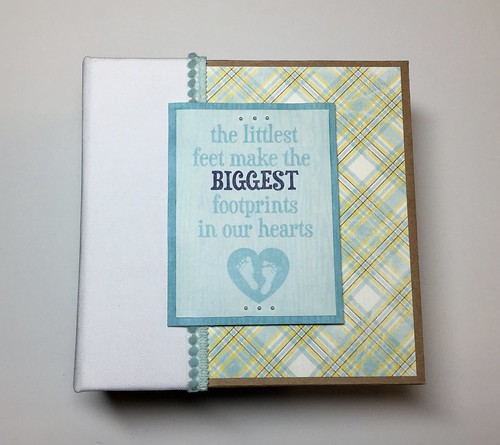
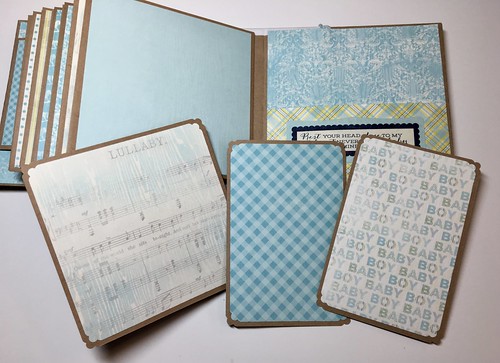
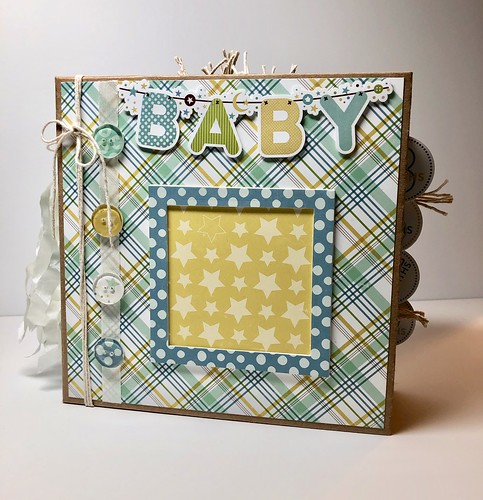
This post is very photo heavy. I used the paper collection Bundle of Joy from Echo Park for this book. I used two collection kits. From my stash I used white seam binding, string, a die from Sizzix called squares framelits and the double stitched circles from Our Daily Bread.
For the buttons on the front cover I had a horrible time trying to search through my collection to find just the right ones to use. I finally gave up for the night when I was working on this part because I couldn't make a decision. The next morning I had a brainstorm while having coffee but I could do anything because I had to go to work. All day I thought about what I wanted to do. When I got home I went straight to my craft room and looked for some clear buttons I have from Hero Arts. I glued them to some of the paper scraps. I then went about doing other things I had to get done. Later when I had time to craft I used my craft knife to cut around the buttons and sanded them little. I love how they turned out and they match the collection!
For the frame on the cover, I die cut several pieces using a Sizzix framelits die and stacked them together. The right side is open so a photo can be inserted.

I made a tassle of sorts for the spine.
I love using crinkled seam binding.

I ended up making seven buttons. Four for the cover and three for the spine.
I didn't wrap the spine like Frances did in the tutorial.
Sometimes I will use sticky back canvas not the spine, but I liked this one without doing that.

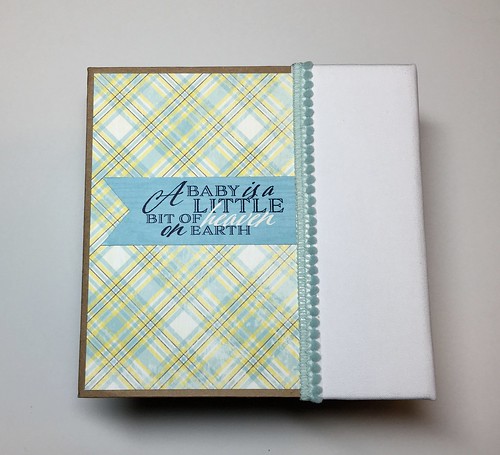
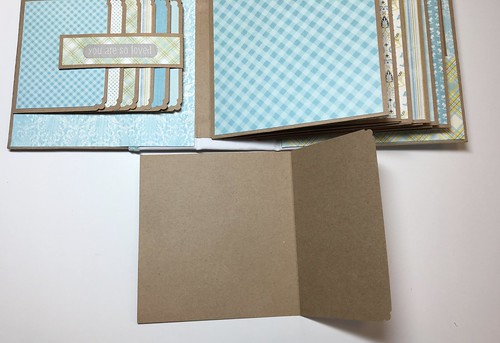
The back cover is pretty plain. I used a cut apart from the collection and mounted it on cardstock.

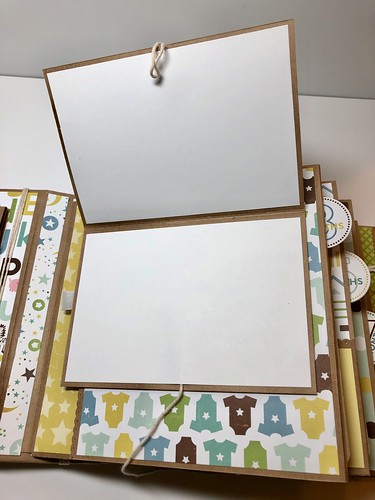
The from inside cover gave me a few issues.
I had no luck adding the expandable pocket as shown in the tutorial.
I ended up doing it a different way. It worked and I'm happy with how it turned out.

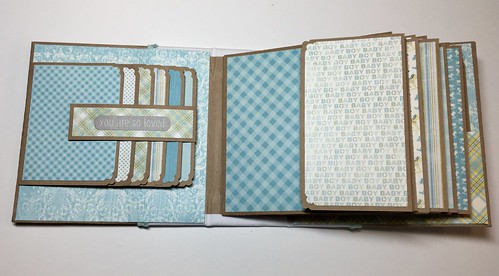
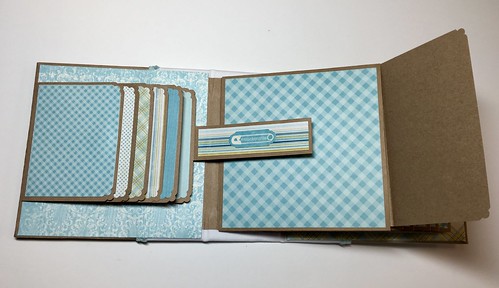
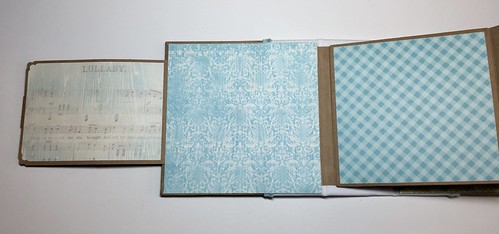
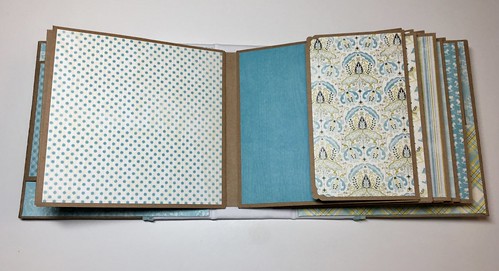
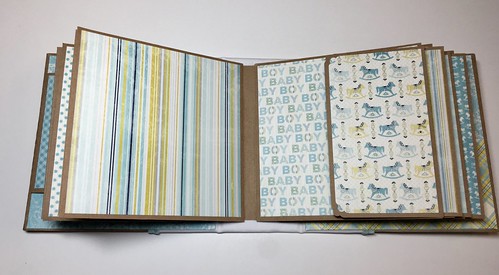
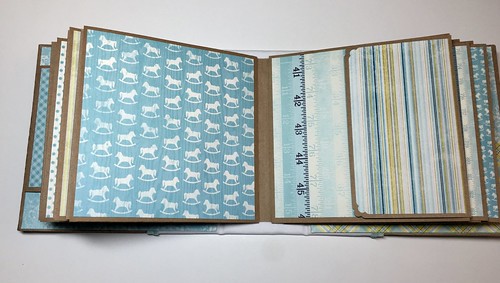
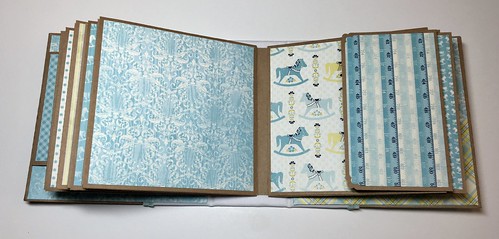
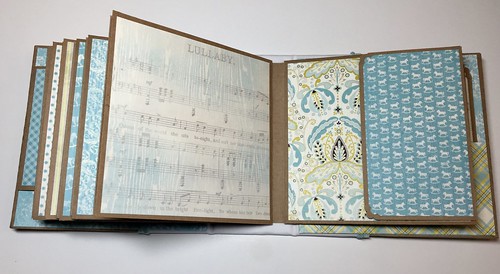
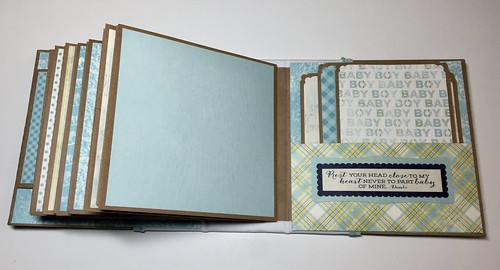
There are many flips and flaps in this book. I love it!

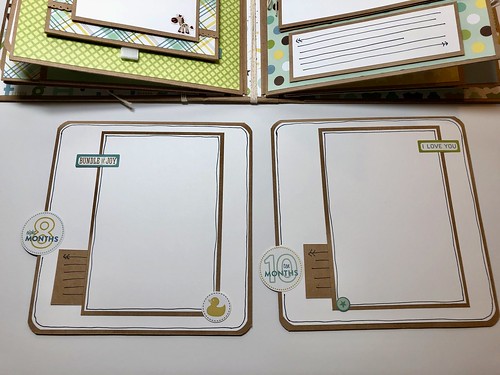
Lots of pockets and places for tags and photo mats!

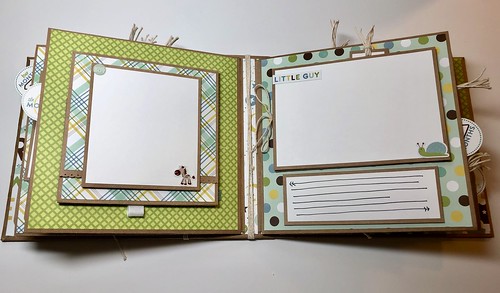

There are tons of journaling spots!


The photo above and the ones below are the photo mats that pull out of the pocket on each page.
I've shown both front and back.


If you are interested in this tutorial, here's a link to it.
I have to put a few finishing touches on some smaller books I have.
One I started last October. The book is finished I just have to embellish it.
After that I'm starting a travel album for my daughter.
If you follow me on social media, I share updates of my projects as I work them.
I love this little chunky book! It's kinda heavy too!
Thanks for stopping by!