Showing posts with label Tim Holtz Idea-ology. Show all posts

Monday, August 12, 2019

Creativity Takes Courage

Creativity Takes Courage

Hello and happy Monday! Is there such a thing as happy Monday?! I didn't used to think so. Now that I don't have to get up and head to work, I believe there is!

I haven't posted anything on my blog for about a month. That's because I really haven't created anything. I'm never not doing something in my craft room, I just either haven't finished a project or I'm putzing around with something. 

I've been in sort of a creative slump lately though. I always know what I want to do, it's just getting it done. I'm also guilty of having too many projects going on at once, which is what I have going on right now. 

I always sift through the emails that I get for card challenges. I love card challenges so much! Over the weekend one caught my eye for The Paper Players. This one is a color challenge. You are to use black, white and one other color. Well, I knew right away that I would be doing this challenge because it's a no brainer for me. These are the kind of challenges I like.  

While I was at it, I looked to see if there were any other challenges I could submit my card to. I found that I would be able to add my card to The Flower Challenge. Flowers have to be the main focal point and my card fits the mold for that one. 

For my card I used an older Tim Holtz embossing folder from Sizzix for the background. I don't know what the name of this folder is as I don't have the packaging and I neglected to write the name on the folder. 

I've been die cutting tons of Tim Holtz Sizzix Thinlets Wildflowers #1 and #2 and watercoloring them for use in future projects. I decided that Rusty Hinge Distress Ink would be the color that I would go with for this challenge. I love the color rust. I just watercolored a sheet of watercolor paper, let it dry naturally and die cut the wildflowers. 

For my sentiment I used a sticker from the Small Talk sticker book from Tim Holtz Idea-Ology. I diecut a banner using the Simple Strips Banner Die from Taylored Expressions. 

My card is linked to the two challenges below.


Thanks for stopping by!

Tuesday, July 9, 2019

Altered Notebooks

fullsizeoutput_34a1 

About a week ago I picked up two fifty cent notebooks with the intention of altering the covers. This past Sunday I saw a blog post from Simon Says Stamp that showed an altered notebook and that's all it took for me to be inspired to try one! I went through my stash and picked things out to use. I was so inspired that I made two!

I flippin' love how both turned out! I haven't done anything to the back covers or the inside front and back covers. I'm not sure yet if I plan to or not. If I do I'll just cover them with patterned paper from one of my Tim Holtz papers. If I was giving them away I would, but if I'm going to use them I don't really need to. When the paper's gone I just have more art for my craft room!

fullsizeoutput_349b 

I've posted photos below of my progress along the way creating both of these notebooks. 

It takes awhile with all the drying time. 

fullsizeoutput_3485 

I added gesso to both covers. 

fullsizeoutput_3487 

I went through my stash and added patterned paper, dictionary paper and ephemera using distress collage medium.

fullsizeoutput_348f 

After the collage medium dried, I added some white paint. 

fullsizeoutput_3493 

After the paint dried, I used stencils to add distress grit-paste. 

fullsizeoutput_3495 

When all was dry, I added several different acrylic paint colors. 

I spritzed a lot of water to move the paint around and dried in between the colors. 

fullsizeoutput_3499 

After all the paint dried I added some distress crayon with my finger in vintage photo with my finger. 

fullsizeoutput_3483 

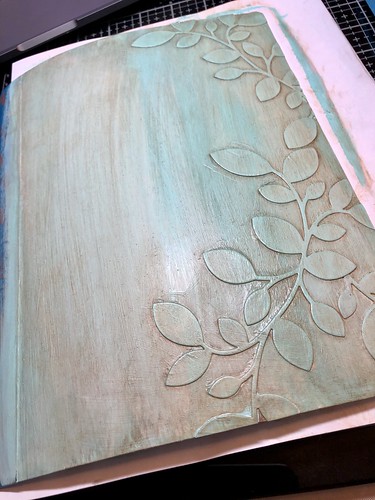
For the second notebook, I added gesso first and then die cut some leaves using a die from Simon Says Stamp and added acrylic paint. After the paint dried, I added the leaves using collage medium. 

fullsizeoutput_348b 

Once the paint dried, I added more paint drying in between layers. 

fullsizeoutput_345f 

When all paint layers were dry, I smudged some distress crayon in places with my finger. 

Below are the products I used. I missed adding a few products in the photos, but I've listed all the names below. 

p8Pg7z6ZR%2oyW+HgKsVDA 

g4eO3Tr9S8eMI+8VUeo5Iw 

gjsTFkveTBmOpbHDQ+r+qw 

nLTBvySNRNCU6ZaLKo+ilQ

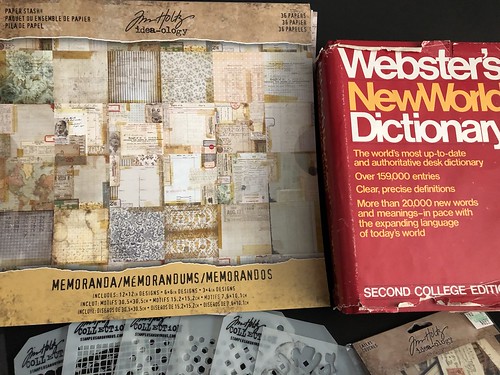
I thought I had lost the dictionary pictured above! I would have been so sad if I hadn't been able to find it! I use dictionary paper for a lot of projects.

I cleaned my craft room a few months ago and put things where I thought they should go. Three times now I have been looking for a particular item and haven't been able to find them. When I clean I purge a lot and I'm always thinking I've gotten rid of something that I want to use. Thankfully, I have had to rip my room apart on several occasions but I have found the items that I've been looking for!
Thanks for stopping by!


Products used:
These were the products not pictured:
Simon Says Stamp: Clustered Leaves die
Tim Holtz Distress Paint - Vintage Photo
Tim Holtz Distress Oxide Ink - Vintage Photo

Products that were pictured:
Tim Holtz Distress products:
Crayons - Vintage Photo
Grit-Paste
Collage Medium
Paint - Picket Fence
Paint - Vintage Photo
Tim Holtz Idea-ology products:
Quote Chips
Hardware Heads
Fragments
Ephemera Pack - Snippets
Layers - Collector
Layer - Remnants
Paper Stash
Design Tape: Butterfly
Design Tape: Postal
Tim Holtz/Stampers Anonymous Layering Stencils:
Gradient Hex
Grid Dot
Linen
Gradient Square
Gradient Dot
ARTplorations Stencil: Happy Flowers
Master's Touch Acrylic Paint:
Scarlet
Virdian
Permanent Black
Violet
Yellow Med
Titanium White
Phthalocyanine Blue
Ranger Glossy Accents 


Saturday, July 6, 2019

See Possibility Mixed Media Canvas

See Possibility Mixed Media Canvas 

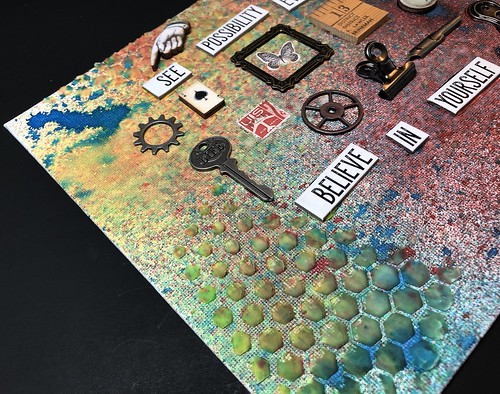
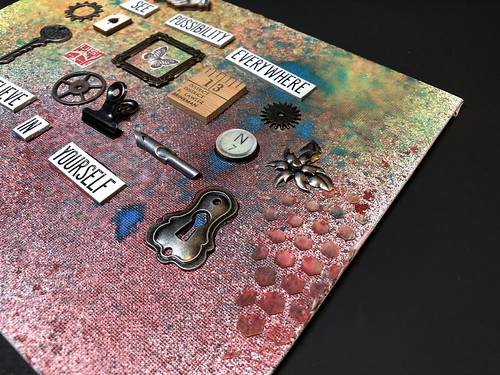
This is the second canvas I was working on yesterday. This morning the molding paste has dried and I was able to add items to the canvas and finish it. 

I wasn't exactly sure what I wanted to do with this one. Just like the canvas I posted about yesterday, I don't remember the colors of ink that I used for the background. I had created this over a year ago and just set it aside. I do love all the different colors in the background on this one. 

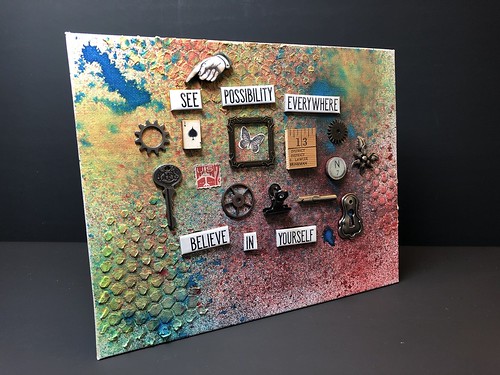
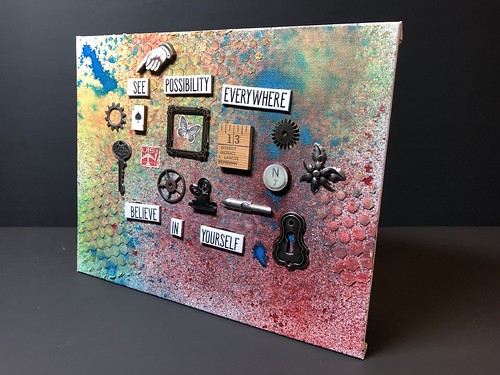
I added Golden Light Molding Paste in three different places using the gradient hex Tim Holtz layering stencil. I love how when it's wet it picks up the color of ink on the canvas.

See Possibility Mixed Media Canvas 

I finally settled on just doing a random collage of ephemera. 

Most of the items I used are from my Tim Holtz stash of items with the exception of a few items.

The ace of clubs card,  hand, piece of ruler, circle with the N7 and the stamp are from an ephemera packet I've had in my collection for a few years. The small metal frame is the last one I had left and it's by Momenta. 

See Possibility Mixed Media Canvas 

I cut apart two of the Tim Holtz Quote Chips sentiments and adhered all items with Distress Collage Matte Medium. A few of the items I used Glossy Accents. 

See Possibility Mixed Media Canvas 

For some reason I thought both of these quotes fit with all of the collaged items. You just have to see that there is possibility everywhere for everything and you have to believe in yourself. 

I love the variation in color where I used the molding paste with the stencil!

See Possibility Mixed Media Canvas

Thanks for stopping by!

Friday, July 5, 2019

Find Joy Mixed Media Canvas

Find Joy Mixed Media Canvas 

Right from the start I'm going to mention that I'm not a huge pink and purple fan. I have nothing against the two colors, they just aren't ones that I'm drawn to naturally. 

The background on this canvas was made probably well over a year ago. I've had this canvas and another one just waiting to have something done with them. At the time I was playing around with distress inks (I don't remember what the colors are that I used) and they turned out a little different than I expected. I just set them both aside knowing that someday I would get back to them and create something. 

I used a stencil called mini bricks by The Crafters Workshop with some Golden light molding paste on both corners of this canvas. The paste picked up the color on the canvas. 

I stamped randomly around the canvas with a Tim Holtz stamp. I don't have the name of the stamp as I don't have the packaging anymore. I then splattered black soot Distress ink over the canvas.

Find Joy Mixed Media Canvas 

Find Joy Mixed Media Canvas 

The flowers are from Little Birdie. I believe I picked them up at Tuesday Morning. 

The metal frame I've had in my stash for awhile. It's from Momenta.

I used Tim Holtz Quote Chips for the sentiments. I cut two sentiments apart. 

The photo is from an ephemera packet that I picked up back in 2013 when I went to a show called Junk Bonanza that is held twice a year here is the Twin Cities area. 

Find Joy Mixed Media Canvas 

I thought the quote fit the photo. The two women look like friends having a good time!

Find Joy Mixed Media Canvas

Now I have one more project off my list! 

I have another canvas that is almost finished. I have everything ready to go to finalize it, but I have to wait for the molding paste to dry. I will share it once I'm done with it. 

Thanks for stopping by!

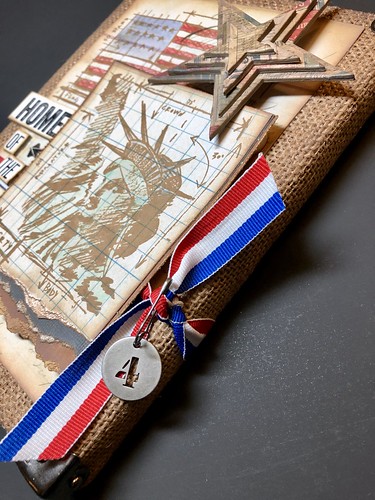
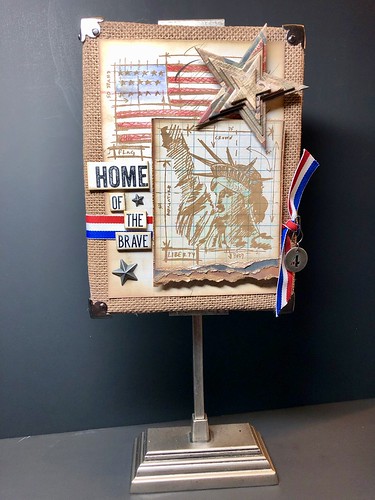
Home Of The Brave Mixed Media Canvas

Home Of The Brave Mixed Media Canvas 

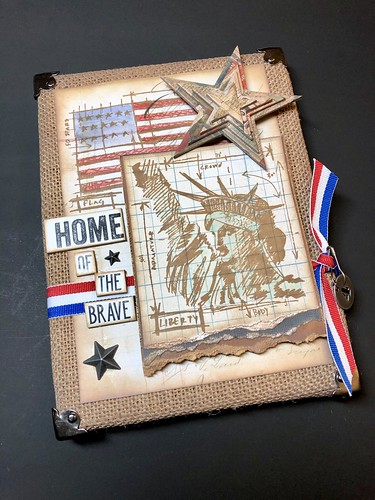
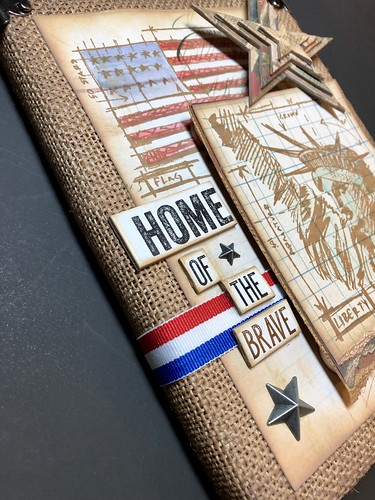
I love Americana decor. I love flags or anything with a flag.

At one point I had quite a few pieces. We had a four-season porch and I had all of my decor on the walls. When I had to down-size after my husband passed away I just kept a minimal amount. I knew I'd never have the room for it wherever I would move to. 

This small mixed media canvas will find a home in my craft room.

Home Of The Brave Mixed Media Canvas 

I actually bought all the products for this canvas two years ago! When I saw this project on Tim's blog I knew I wanted to make one. Here's a link the Tim's original blog post. He has a tutorial on his blog and he lists all the products that you will need for this project. 

I have so many projects that I want to work on or finish. I now have the time to do that!

Home Of The Brave Mixed Media Canvas 

Home Of The Brave Mixed Media Canvas 

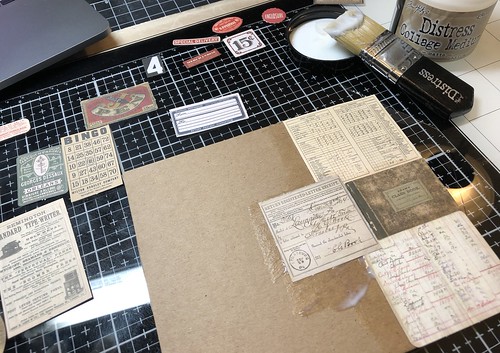
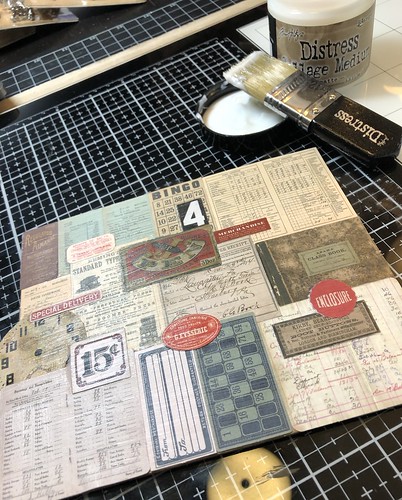
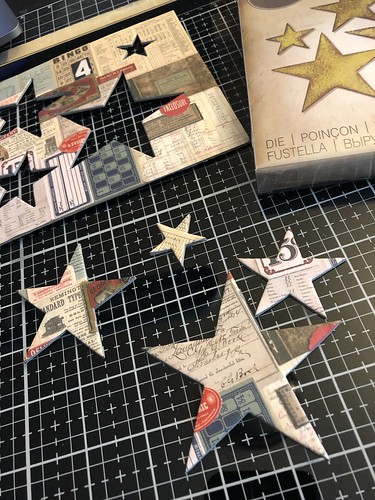
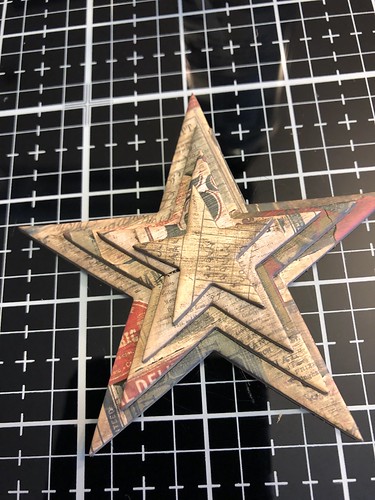
Before die cutting the stars I adhered bits of memorabilia to a piece of chipboard. 

Home Of The Brave Mixed Media Canvas 

Home Of The Brave Mixed Media Canvas 

Home Of The Brave Mixed Media Canvas 

Home Of The Brave Mixed Media Canvas 

After I diecut the stars I adhered them together. 

Home Of The Brave Mixed Media Canvas 

Once I watercolored the flag and the statue of liberty I was ready to assemble all the pieces.

I love how it turned out!

I didn't sew around the edges of both of my panels. I was too lazy to set up my sewing machine. I was going to use some stamps that I have that are stitched lines, but after looking at the panels I like the way they looked without stitching. 

Home Of The Brave Mixed Media Canvas

Thanks for stopping by!

Tuesday, July 2, 2019

Mini Junk Passport Book

Mini Junk Journal 

I have been collecting ephemera for making junk journals for years.

When I lived in Wisconsin I used to wander around the Antique stores looking for anything that could be used in a junk journal, even though I hadn't really started making them yet. 

In 2012 when I was visiting relatives in Kentucky we went to the Milton Flea Market in Milton, West Virginia. We had first gone there in 2007 and loved it! I picked up quite a few old books that I've kept stashed away in my craft room. I take pages out of the books every now and then to use in projects. My plan is to take all the pages out of each book and makes signatures to add inside and then embellish the books. I'm going to be visiting that Flea Market very soon!

When I moved back to Minnesota after my husband passed away in 2013, I went to Junk Bonanza. I found a dealer that was selling ephemera packs. I was thrilled! I picked up five of them. They've been sitting in a drawer patiently waiting to be used in junk journals.

I've also been collecting ephemera from Tim Holtz and I've got some in my stash from 7Gypsies. Actually I collect anything that looks like it will fit in my idea of what should go in a junk journal. 

I started this book about a week and a half ago. I took a break from crafting for a few days and just finished it last night. For this little junk journal I used the Sizzix Scoreboards XL die by Eileen Hull called Passport Book. I have two other journal dies by Eileen that I'll be using soon. I've had these dies for awhile because I've been collecting! I did buy some Sizzix Little Sizzles Mat Board, but for this project I just used chipboard. 

I used the Engraver collection by Prima for this book. I have all the embellishments for the collection but I only have the 6x6 paper pad which means whatever I create has to be a small project. I didn't use much for this book so I have plenty of paper left to use. This collection has been retired but can easily be interchangeable with paper from Tim Holtz. You can tell I've had it for awhile since it's retired!

For my cover I used embellishments from the Prima collection and filled in with a quote chip from Tim Holtz, some steampunk buttons (not sure where they came from), and a key that I have a small bag filled full of. Inside the decorative frame, I used some of the package backing. I just cut out the part I wanted and adhered it to the back. 

Mini Junk Journal 

The charm on the spine of the book is one of the Vintage Trinkets from Prima.

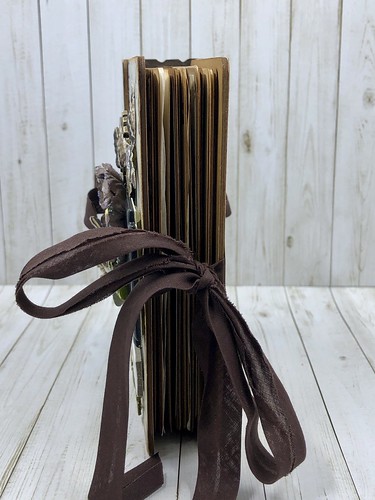
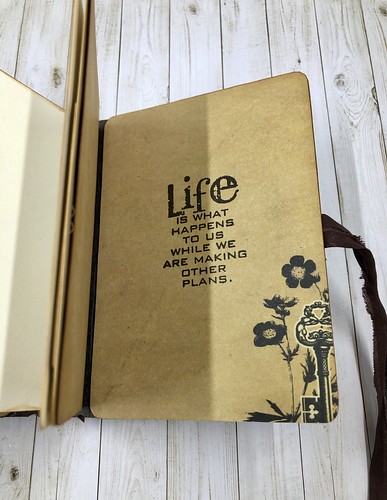
The brown seam binding I used for the closure and on the spine came out of one of the ephemera  packs I have. 

Mini Junk Journal 

Mini Junk Journal 

There are three signatures inside this book. 

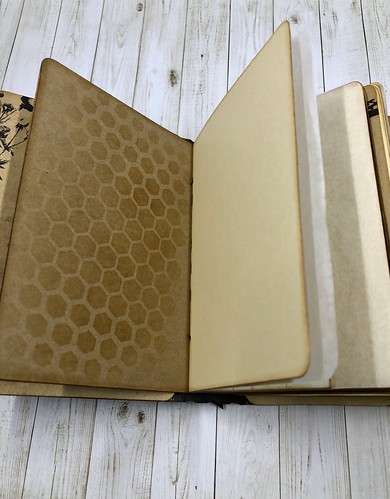
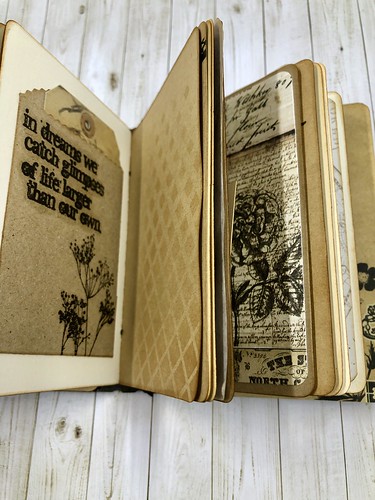
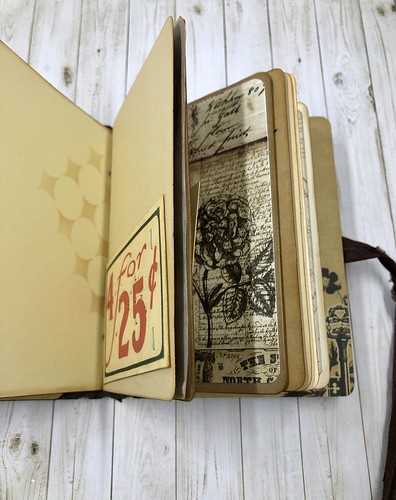
Inside each signature there are pages that I have covered with patterned paper and I've added papers from some of the ephemera packs. I've also added deli paper. Not all the pages have patterned paper added. I've added a pocked here and there using mini paper bags. I've stapled a few items to some of the pages. It's really pretty random. I also used some Tim Holtz washi tape to adhere some tickets to the pages. 

I used several layering stencils from the Stampers Anonymous Tim Holz collection throughout the book with Ranger vintage photo distress ink. I also inked all the edges with this ink. 

The signatures were attached using round electric cord.  

I used several clear and rubber stamp sets that I have in my stash from Stampers Anonymous/Tim Holtz. I stamped on several of the pages and on the covers of each of the signatures. 

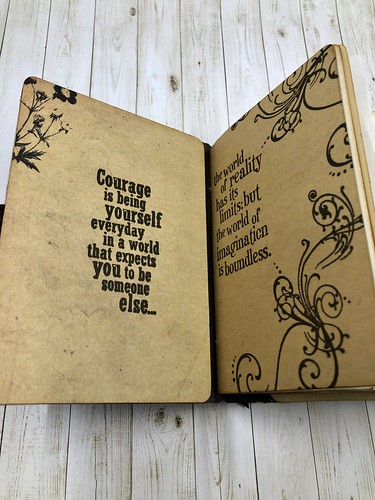
Because I couldn't get the pages to lay flat for photos, below I have added a few so that you have an idea of what the inside looks like. 

Mini Junk Journal 

Mini Junk Journal 

Mini Junk Journal 

Mini Junk Journal 

Mini Junk Journal 

Mini Junk Journal 

Mini Junk Journal

Mini Junk Journal

I just love little junkie books so much! 

If you're wondering what you would use these for, they can be used to add photos & journaling. You could also add bits and pieces of memorabilia. 

I have another one that I'm working on, but I haven't decided what I'm going to use for a closure so I've just set it aside for now. I've got about eight projects going on right now! I know that would make some people crazy, but I get bored or my creative process stops and it seems like if I have something else to work on it helps me when I go back to another project. I'm also in the process cutting all the cardstock for two gatefold books. I always get everything done! 

What I'm really enjoying is that I have TIME to finally do things that I enjoy and that's all that matters to me!

Thanks for stopping by!


09 10